Symptoms of a Bad Variable Valve Timing Solenoid and How to Replace
The VVT or variable valve timing is and always will be one of the most noted breakthroughs in the history of automotive innovation. In modern cars, VVT systems are used to improve performance and fuel economy by altering the valve lift event. This is what allows just the right amount of oil supply, this allows the engine to give great and fuel-efficient performance.
It is a system that uses electronic technology to apply variable electronic systems through a variable valve timing solenoid. In case this VVT solenoid goes out of order, improper lubrication can cause a lot of damage and disruption to the gear and the timing chain. When this problem occurs with Variable Valve Timing Solenoid, many symptoms are bound to manifest this fault.
Symptoms of a Bad or Failing Variable Valve Timing Solenoid
Here are the symptoms that you must look out for to know that the VVT solenoid is failing or is not functioning well:
1. Check engine light on
This is the thing about modern cars the ECU or engine control unit starts to warn you as soon as it finds some problem in the engine. It can, in fact, practically monitor all the individual parts of the car. So, in case of an impending variable valve timing solenoid failure, it is due to warn you with a check engine light.
If this happens, you must contact your car service provider and have an ASE-certified mechanic check it. They can certainly help you diagnose the problem and reset the check engine lights.

2. Dirty engine oil
This is one of the variable valve timing solenoid symptoms that are also the cause. The VVT solenoid system performs best with clean engine oil. When the oil has a lot of impurities, it loses viscosity. This can also cause clogging in the variable valve timing solenoid system, thus also clogging the chain and the gear.
If you see dirty engine oil, chances are that the VVT solenoid system is going out of order.
3. Roughness in idling engine
The passing of additional oil to the VVT gears is a possibility if the system is not working properly. This very phenomenon manifests itself in the rough idling of the engine. It is primarily because the engine’s RPM fluctuates as the VVT starts working. When this symptom is ignored, it can cause premature wearing out of the engine.
4. Decline in fuel efficiency
The function of the VVT is to control the open and shut timing of the valves so as to maximize fuel economy. Any malfunction here can cause a waste of fuel or a dip in performance. If you notice decreased fuel economy, chances are that the variable valve timing sensor or some other part of the VVT system is failing.
Now that you know what all symptoms indicate variable valve timing solenoid failure, you must also know that it is imperative to replace a faulty VVT solenoid.
How to Replace Variable Valve Timing (VVT) Solenoid
Once you have diagnosed a problem in the variable valve timing solenoid, it is best that you either get it replaced or do it yourself. Not doing so can cause totally unpleasant results like plummeted engine performance, untimely wear and tear of the engine, and visibly decreased fuel economy.
So, follow this maintenance advice, and let’s learn how to replace it.
Here are the things that you’ll need

- Service manual
- Pry bar – 18” long
- Pick set – long set
- ¼” sockets – metric and standard
- ¼” ratchet
- ¼” extensions – 3” and 6”
- Bungee cords – 12”
- Channel-lock pliers- 10” or 12”
- Flashlight
- Needle nose pliers
- Dielectric grease-optional
- Box of rags
- Lithium grease – assembling lube
- Telescoping magnet
- Ratchet
- Extensions – 3” and 6”
- Sockets – metric and standard
Variable valve timing solenoid replacement process
You can replace it in 10 careful steps.

1. Opening the hood and engine cover
Start by raising the hood and keeping it secured so that it stays up. If there is an engine cover, go ahead and remove it. The latter will be either secured with nuts and bolts or snap-fastened. In both cases, it is pretty easy to undo it.
2. Disconnecting the battery
Disconnect the battery carefully by loosening both terminals. Now simply twist and pull to remove. Make sure that you keep the cables aside by preferably trying them down with a bungee cord. This assures that they don’t come in contact with each other.
3. Locating the VVT solenoid
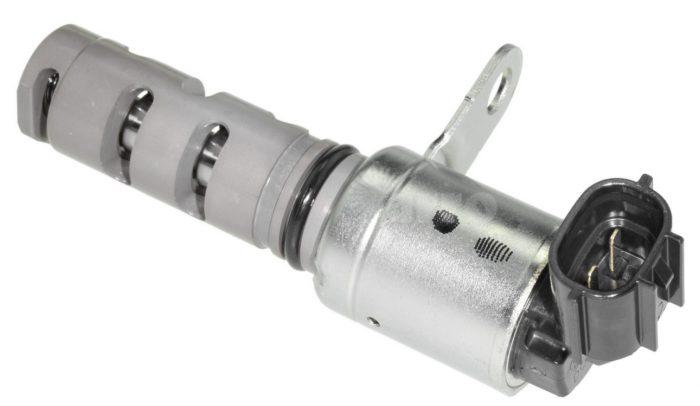
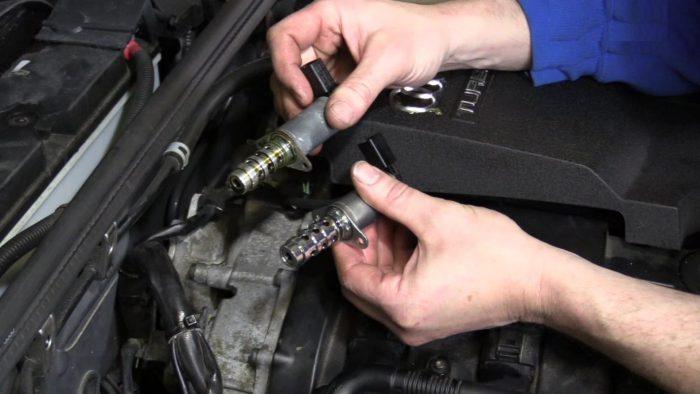
It is located near the front of the valve cover, i.e. in the front of the engine itself. If you take the new solenoid and try to locate something that looks similar, things will be easier. You will be able to see the connector that lies at the exposed end of the variable valve timing solenoid. Once you have found it, use bungee cables to clear the area of any wires or harnesses.
4. Locating mounting bolts and removing
Usually, there is just one bolt that you will find. In some cases, there will be two. Look at the solenoid’s mounting flange to check.
Remove these bolts carefully and store them in a safe place. Make sure you don’t drop it in the engine compartment while undoing it.
5. Disconnecting and removing the solenoid
In order to do so, simply remove the connector that you see on the solenoid. Pull gently on the connector so that the wire isn’t pulled. Most of them open by pressing the tab to release the lock.
Now remove the solenoid with the help of a pair of channel locks. The grip on the most robust metal part and pull. Try twisting it while you pull.
Variable Valve Timing Solenoid replacement could be done by yourself following these steps.
6. Inspecting the VVT solenoid
Once removed, take a good look and ensure the entire thing is out. Sometimes the o-ring screen or any small part of the valve may be left behind. Check the solenoid mounting surface for the same. Also, remove any kind of debris that you find with a long pick or needle nose pliers.
7. Preparing and inserting the new solenoid
Lubricate the new solenoid. Also, lube up the seals on the solenoid spool (the part where you insert the solenoid) with lithium grease.
Now, insert the fresh variable valve timing solenoid into the mounting surface hole. If you feel a little resistance, don’t force it. Try twisting while pushing. It works.
8. Securing the VVT Solenoid
Now take the mounting screws and tighten them well.
9. Install the connector
Take dielectric grease and apply some on the seal and the connector’s face to prevent corrosion later and ease the installation now. So, it’s optional but advised.
10. Replacing and packing
Rearrange anything that you had set aside from the area – the wires, harnesses, etc. Now, re-install the engine cover as well and reconnect the battery. Connect each terminal to the battery one by one. And tighten.
Tada! You’re done with variable valve timing solenoid replacement!


