
You can avoid all the hassles if you know the reasons for the engine light coming on. Nevertheless, it sometimes does not turn off despite solving the glitch.
In that case, you will need to know how to reset Check Engine Light!
Contents
How To Reset Check Engine Light: 4 Easy Way to Do
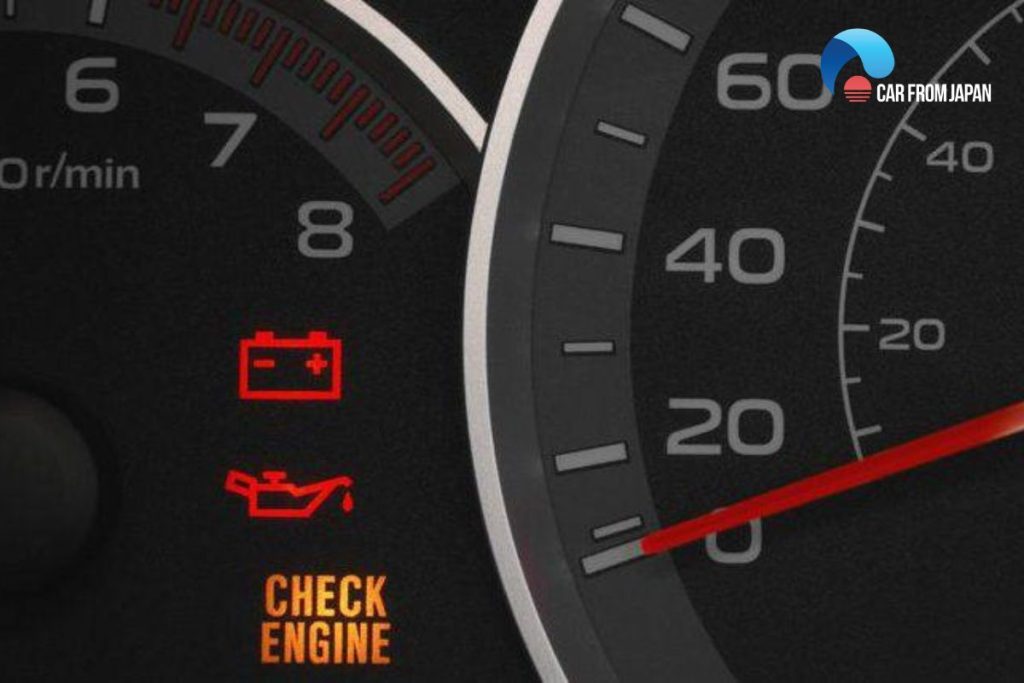
The check engine light comes on when your car’s computer detects an issue within the powertrain.
It can indicate a major or minor complication, but ignoring it definitely makes the problem worse, leading to costly damage and repair.
Most of drivers feel annoyed if the red light of the Check Engine Indicator still does not go away even the fault of the car was fixed. In this case, your vehicle’s computer is at fault and it needs a little fix to resolve the issue.
Use A Scan Tool
Using a scan tool is the easiest way for check engine light reset. If you wonder to know how to turn off check engine light by this way, here are 3 steps for you.
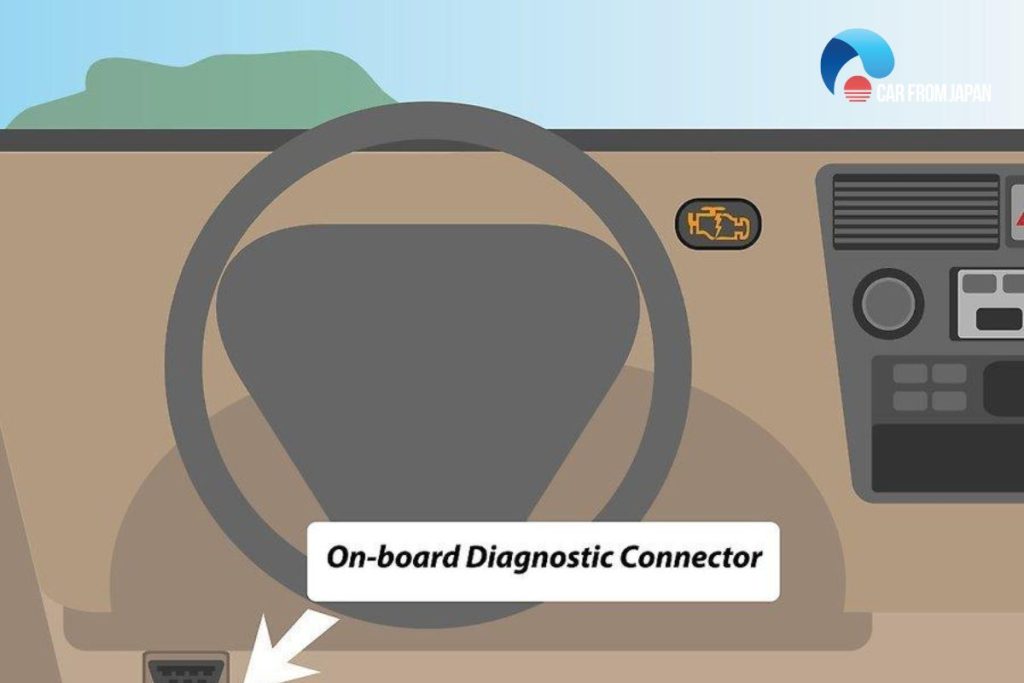
Step 1: Connect the scan tool to the OBD – II
Connecting the scan tool to the OBD-II (On- board diagnostic connector) under your steering column. Then you turn the ignition switch to ON and don’t forget to turn of all gadgets.
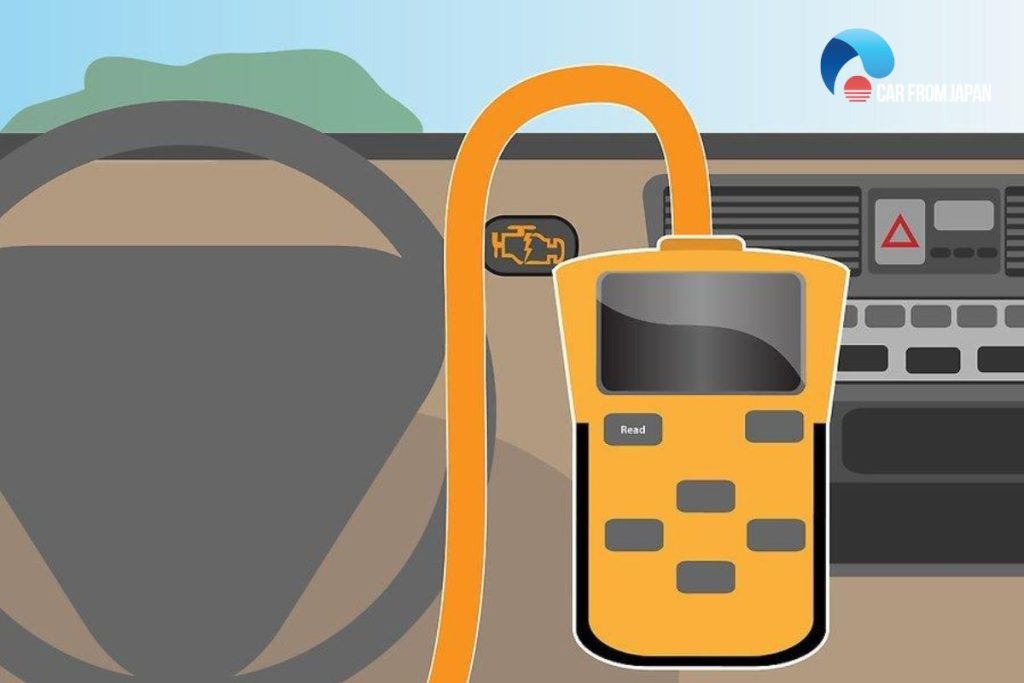
Step 2: View error codes by pressing the “READ” button
Pressing the “READ” button on the scan tool to see the error codes of the engine. You should need a pen to write down the code or codes in the order they were received for future repairs or reference if needed.
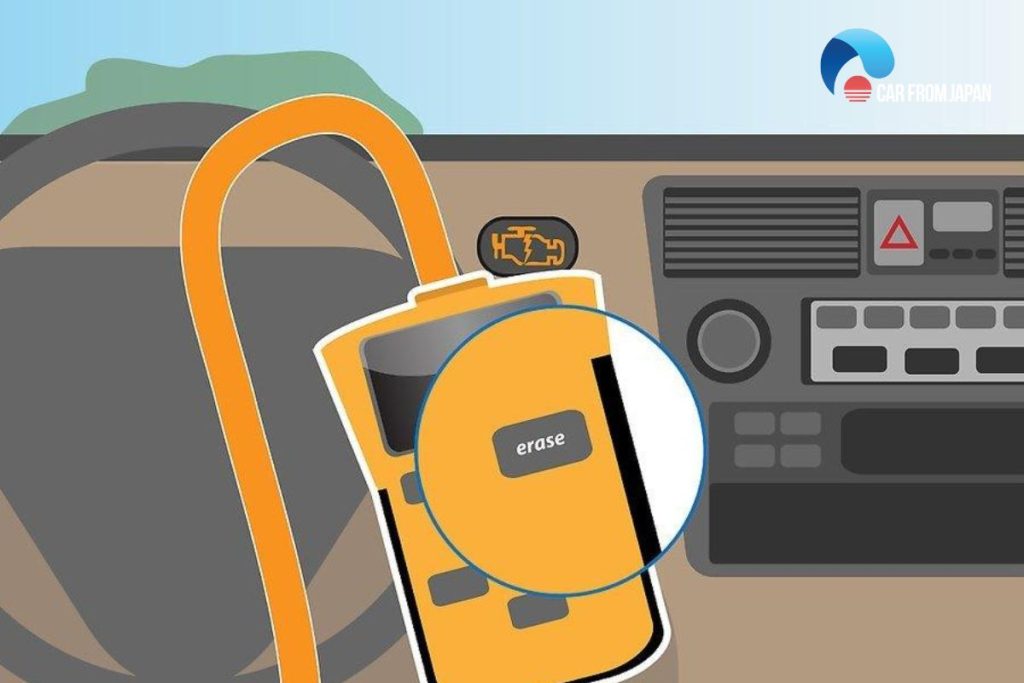
Step 3: Remove the error code
Pressing the “ERASE” button on the scan tool to remove the error code. The Check Engine Light will turn off if all error codes are cleared.
Some scan tools have many capabilities such as freeze frame that notes some sensor readings when a code was set and removing the codes will also remove this file.
Note: In some scanners, they might have an automatic option and a “CLEAR” or “YES” button instead of “ ERASE” button. Don’t forget to turn on the ignition before deleting the codes.
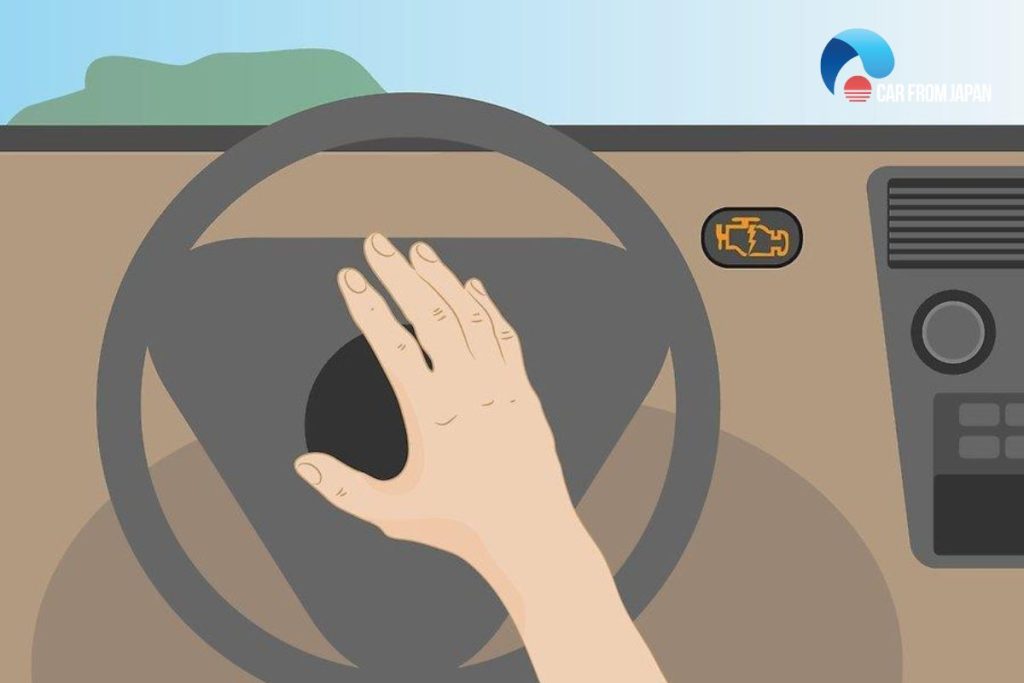
Apply The Battery Disconnecting Technique
Using battery disconnecting technique is an old way to reset check engine light. Here are 3 steps to help you know how to reset check engine light by this method.
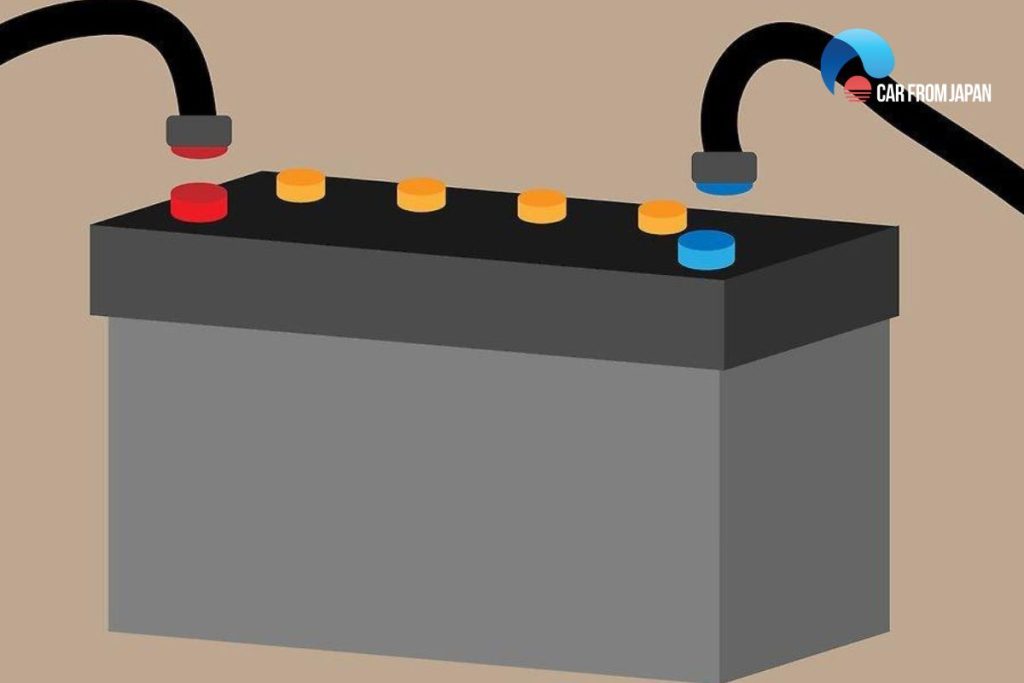
Step 1: Disconnecting car battery cables
In this step, you should use a wrench to remove positive and negative cables.
Step 2: Draining remaining electricity
Next thing you should do is to press and hold the car horn for about 30 seconds. This action will help to drain any electricity from your car capacitor.
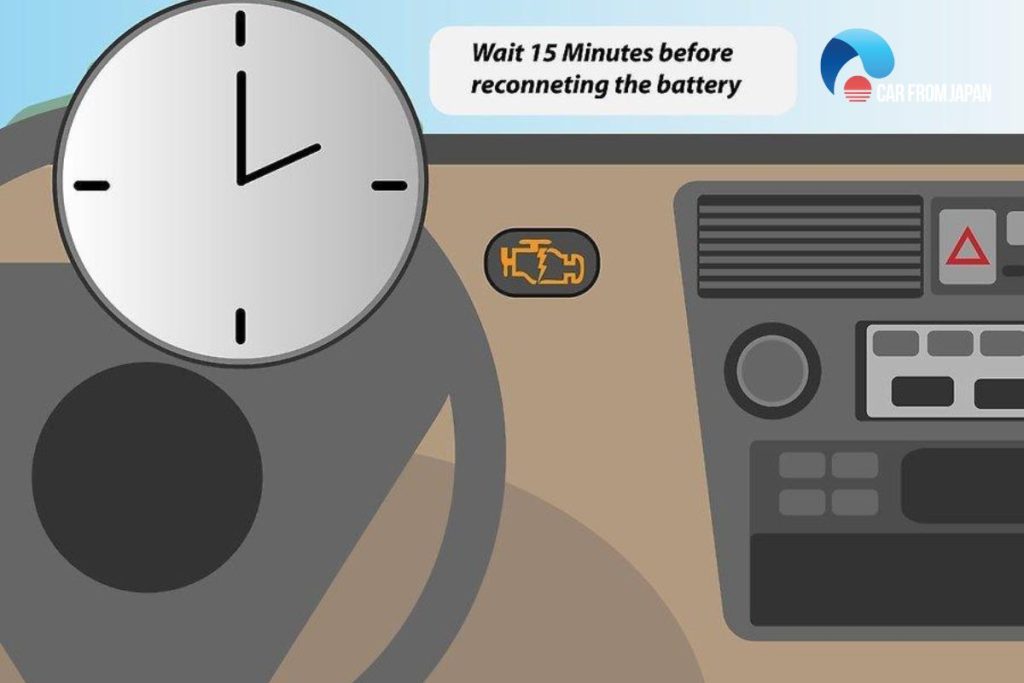
Step 3: Waiting and reconnecting the battery
After disconnecting the battery cables and draining remaining electricity, all you have to do is to wait about 15 minutes then re-install the car battery cables.
The error codes should be deleted which will cause the engine light to turn off. (Note: this method may not word on all car computers).
In case, the car battery is disconnected and the light comes right back on, this may show an active problem and should be addressed and fixed.
Turn The Ignition On And Off
It’s a repeat of the previous technique without disconnecting the battery. You just have to put the key into the ignition and turn it on and off for three times in a row with the gap of a second in each step.
After you are done, drive the car to see if the light is reset.
Let The Check Engine Light Go Off By Itself
Another way of how to reset check engine light is letting it go off by itself.
It’s an easy process because you need to do practically nothing except for driving the vehicle as usual. The computer system in most cars keeps rechecking the problems that activate the light in the first place.
If it’s a minor issue such as a glitch in the mass airflow or O2 sensor, it may fix automatically, and the light will go dark. However, if it still stares at you after three days, you have to apply the methods mentioned above to reset it.
What If The Check Engine Light Returns?
In the worse scenarios, the check engine light may come back within a few days or weeks, which may signal a major complication.
If it keeps happening, despite the resetting procedures, you should take the car to a service center and have it diagnoses by a professional mechanic.
In case you want to self-inspect the relighted engine light, you can follow some notices below.
Read the error codes again
Use an OBD-II scanner to retrieve the error codes. Note down the specific codes, as they provide crucial clues about the nature of the problem.
If the codes are the same as before, it confirms the original issue wasn’t fixed. New codes might indicate a different problem or a related issue.
Research the codes
Look up the meaning of the error codes online or in a repair manual. This will give you a better understanding of the potential causes and help you narrow down the possible culprits.
Inspect for obvious issues
Depending on the error codes, you might be able to check for some obvious problems yourself.
For example, a loose gas cap can trigger certain emissions-related codes. Check for vacuum leaks, damaged wiring, or other visible issues that might be related to the codes.
Consider recent repairs or modifications
If the check engine light returned shortly after a repair or modification, it’s possible that the repair wasn’t performed correctly or the modification caused unintended consequences. Double-check the work or consult with the mechanic who performed the repair.
Don’t ignore the light
Continuing to drive with the check engine light on can potentially worsen the problem and lead to more extensive and expensive repairs. Address the issue promptly to prevent further damage.
FAQs on Resetting Check Engine Light
Will a check engine light be a downside of your car system?
Despite all the benefits we can visually tell, the engine light may have some drawbacks.
It may detect the wrong issue that does not really exist. Moreover, any loose electrical connections may cause the system to record a false light.
In any instance, you can not know for sure unless you let a mechanic check the problem. So eventually, presuming that your check engine light is broken is not always ideal.
How long does it take for check engine light to reset?
In most circumstances, correcting the problem that caused the check engine light to illuminate will lead to its turning off automatically.
But this event happens only after 10 to 20 cycles, which refer to the process of starting the vehicle, operating it for a while, and then shutting it off.
How long does it take the check engine light to go off if it was the gas cap?
If the check engine light was triggered by a loose gas cap, it will stop lighting after a few minutes of driving.
Pay close attention to the dashboard. If the light persists in illuminating and is off after the gas cap is closed again, the high chance is the cap is loose.
Can the check engine light go off after a week?
Yes, it can suddenly go off during use. If your check engine light is still on after repair after a week or two, there may be some problems with your catalytic converter or oxygen sensor.
If the issue that triggered the check engine light is corrected, the light will turn off.
Accordingly, when you conduct a lot of stop-and-go driving, which puts a heavy strain on the converter, the check engine light may have come on.
In addition, if you then drive on the highway for a while before the oil change, the car specifications may go back to the average range, prompting the light to stop illuminating.
How long do you have to drive to reset engine light?
After resetting the check engine light, you need to drive for about 80 to 150 km more to help the car’s computer have time to monitor any kind of sensor and learn/register the data once again.
Check out this video from TampaTec to learn more about resetting check engine light visually!
Hopefully you may now know how to reset check engine light by DIY methods through this article.
If you have any questions, leave us a comment on the box below, we will answer it for you!
Ilove car from japan, you give lesson on how maintanance can be done, whichever needed you provide the information at atime.lwo’d like to tell my friend and other people to keep on buying used car from japan
I have been asking many mechanics what check engine light on my dashboard means with no satisfying answer.
My car doesn’t charge but the battery light doesn’t appear on the dashboard why?
Thank you for contacting Car From Japan. However, we cannot answer your problem because there are many things we need to see at your car. I suggest you bring the car to a local mechanical shop to solve your problem.
Mine has an engine check for almost a year now when i took to the dioganisys machine it just gave numbers which was the cause of the problem but couldn’t know what was the meaning of those numbers
Try to google ‘trouble shooting codes’ of your cars’ make and you’ll get the answers about what is it actually that needs to be diagnosed…
Like these lessons, I learn a lot from this platform.
Thank you. We will provide more useful information like this. Stay tuned
Morning
Actually it is a very educative information shared there. I really appreciate
Well taught have learnt something here,thanx for your tips
Well taught have learnt something here,thanx for your tips
We are glad that you like the article. Don’t forget to share with your friends!
How do you resolve a throttle sensor issue?
Thank u for asking us. We will search more information and update later
Wonderful site..my car is a Nissan sunny saloon B15 model..I would like to get updates on it power steering ,fuel consumption and power performance
We are happy to receive your comments. Please share with your friends so they can enjoy this article, too.
Very informative site and a great assistance
We are happy to receive your comments. Please share with your friends so they can enjoy this article, too.
It’s interesting to note the second point that says disconnect the positive terminal.. this is obviously to isolate any power to the computer box. Surely it would make sense to disconnect the negative terminal and then the positive thereafter being that 99.999% of vehicles nowadays are if a negative chassis/earth? Safety first?
Next, tell us about the ABS lights. And how to reset it. Thank you once again.
Informative, clear and concise. Thanks
Thanks a lot, i just learnt something very important
Mine has an engine check for almost a year now when i took to the diagnosis machine it just gave numbers which was the cause of the problem.
Hello… Hav Nissan expert (Ad)…. when I engage drive the engine shake from gear No. 1 to gear No 2…. plus the check engine light never disappeare
My car is Toyota ractis the check engine light comes after you have gone at constant speed when you stop and switch it of and then on it disappear only to appear again after driving at constant speed what could be the issue
Why is it that my automatic Toyota car blinks on the dashboard/ showing hazard lights , especially when i am travelling at a low speed?
When should I drive with the orange light ; showing on the dashboard ” O D off”? At what speed.?
What a wonderful lessons ..from car from Japan …I have learned a lot out of the post your have been posting
Does the engiecheck light affects the idle rpm.please would explain further
Mine is a Mazda bongo which came having the DPF on. After visiting my mechanic, he realised the check engine light was missing(bulb). So he put a bulb there and the check engine light has been on since then…almost two years now! When taken to diagnostics, all error codes are about DPF. Since I suspect the DPF system was messed up by the time of buying the van, my mechanic advised we ignore the light!
Does oxygen sensor problem result to higher fuel consumption
So educative information there thanks a lot, love to have other tips on this.
I have a 1990 Toyota Mark 2 LX80 and the check engine light will not come on with the key in the accessories position. Not sure where the bulb is in the instrument cluster for the check engine light. Can someone please help me out?
i was once driving this 7 sitter ipsum, where i noticed that whenever you try to accelerate, the vehicle will hesitate to pick up and the car will jerk…… after noticing that i also saw an engine check light on…..and i was told by another electrician that it might be a computer box which which has an error…so what could be the problem to that?
If it was jercking and a delay in picking then the fuel pump is at fault.you need to change it with its filter.
Hi
My car does not run engine immediately, it takes far, sounds like the diesel is not coming up immediately, why?
I had my Check Engine light on and went to the dealer over and over for diagnosis. Their scanner showed a faulty catalytic converter with an estimate of $1800 for replacement. It didn’t make sense since the car was running fine. To make things worse, I wouldn’t pass emissions inspection with the check engine light on. I spent a lot of time on online blogs and took advice. The first thing to do is to change the gasoline you are using to a top brand premium grade. I was using 87 octane from a cheap gas station. After burning off the cheap gas, I bought Shell premium and filled up. Within 4 days, the check engine light went off. You can’t trust the dealers to tell you the truth. An online blog said to try this. If someone online knows this, the dealers must also know this, but they try to sell you an $1800 repair job. Upgrade your gasoline before trying anything else.
Engine light was on I did not fix the problem but now the engine lights off I know what the problem is but now the engine light won’t come on when I turn on the key what could be wrong
Hi, I blocked my EGR valve and turn off the check engine light but after driving for about an hour the check engine light returned again, what do I do?
thanks.
Hi Ife Mbams ,
This was a great information about the resolving of issue permanently in a car during driving easily by using the service of Victoria car removal in Melbourne with in a short period of time a start your journey safe and fast without any trouble shoot ,If your car is still running before you sell it to the junkyard due to any kind of issue then you must use the service of car removal in Melbourne , you might want to use up the gasoline in the tank before you have it towed away. Depending on the size of the tank in your car or truck, the value of the gasoline in the tank can represent a substantial portion of the total value of the price you’re getting from the junkyard. If your car isn’t running, be careful if you attempt to siphon gasoline from the tank. Use only approved containers to carry the gasoline, and never start a siphon using your mouth. Don’t worry about the value of the gas to the junkyard. They’ll have to drain all the fluids out of your car before recycling or scrapping the parts, and gasoline in the tank is a nuisance for them.
Thanks .
Does a 2000cc engine use more fuel than 1500cc, then my car looses power when climbing a hill. Kindly advise
Car: Nissan Serena
my automatic car (honda CRV), has lost power and is very weak in uphill drive. what could be the problem?
Good evening ;
Thank you for this lesson, I’ve just taken an answer to a problem; I asked to local mechanics but never be satisfied.
By the way I have a question, if after being to a specialised mechanics, the check engine light Still turn on; what could be the ultimate solution that I can expect to?
Thank you so much for this informative and educative article.
Hi,I changed my casket recently but the check engine keep on coming on and off,what could be the problem? ?
Changed your casket???? Are you a Zombie?
Good morning, how do I know that the Over drive is on or off and when should over drive be on and off. In an Ipsum latest car with 2az engine.
This is so informative, I like it. Hw can u reset the speedometer of a car.?
How To Reset check engine and OD lights
good morning gents can anyone assist my Nissan np3oo having problem is flashing engine warning light & engine doesn’t have power, the speed limit not exceeding 80km,
Hello, have a question with my Ractis push button car. Today I took off my car battery and when returned back the card start well but the relent is not coming up, can’t move or drive a way.what can I do the help me?
Hi
The engine light still does not go off what do we do now
My X Trail 2.5 is stuck in safe mode I have changed the air flow sensor and the throttle control switch.
Excellently written article, if only all blogger offered the same level of content as you, the internet would be a much better place. Please keep it up!.Great tips, I would like to join your blog anyway.Waiting for some more review.Thank you
An excellently written article, if only all blogger offered the same level of content as you, the internet would be a much better place. Please keep it up!. Great tips, I would like to join your blog anyway. Waiting for some more review. Thank you
I love carfromjapan… Much more to learn from here
I am facing problem with check engine and ABS light to my Toyota sienna car, earlier I thought probably I delayed to service, i did service check engine and abs light comes back, help me to identify the faulty of my Sienta.
An excellently written article, if only all blogger offered the same level of content as you, the internet would be a much better place. Please keep it up!. Great tips, I would like to join your blog anyway. Waiting for some more review. Thank you
Hey!! That’s a really great article helps you understand the importance of check engine light. Most of the people just don’t understand the importance of checking the check engine light.
I have a Toyota Mark 11 and has the Check Engine Light on, and when the car goes over heat, the engine cuts off, what should I do?
i did what the suggestion said, about resetting the “check engine light.
Now the car won”t start or even turn over.
What should I do
Rang the Honda main dealer when the check system light came on. 1 month after a major main dealer service by the way. They wanted £101 to plug in their diagnostic tool and tell me what the problem was. Local garage did it for a tenner.
I have a Mercedes Benz C180 2012 model. The engine light always comes and sometimes it is off . What can I do
Mine is a vitz 1kr engine.i delayed in servicing then i discovered that there is slag inside.then the engine check light was activated.now can the slag activate the engine check light?
I usually see that check Engine light on my car when either I am accelerating to over take, or on high speed or while climbing a hill. And I thought it’s a sign that my car engine is consuming more at that specific time. It usually comes and goes off after some time then it comes back again. Does it mean that I was misinterpreting it?? It’s a Subaru Forester 2005model
I tried to turn The Ignition On And Of three times per the instruction (3rd method). However, the light won’t go away.
Does this method applied to every car model? My car is Honda Odyssey (2011).
Thanks.
suzuki baleno sedan engine lights on and fuel gauge not working. recently cleaned the catalytic but in vain still the trouble persist kindly suggest a solution
Disconnect your battery power source both negative and positive terminal. Turn on your head lights for 15 minutes to complete power drain. Reconnect your battery terminals and engine light should be off.
I have a Suzuki every model 2011. My engine check light showed up and I went to the mechanic. He connected obd and started the car after a while the engine light went off. He drove a bit and said that it’s fine now the engine light is gone no sensor error showed up. He said sometimes the catalytic converter is blocked with rubbish its fine now. Do you guys think the light will show up again? It’s not been 24 hours yet.
My Toyota Fielder ..has as check engine light they appears when off road , bit on tarmac its cool…what does that mean ..my mechanic has made good cash from me claiming its oxygen sensors…. I have replaced all but nothing.
The catalytic converter in my 98 mitsubishi eclipse needs to be replaced however I have been told they do not make them for this car anymore. What can I do?
GREAT STUFF, AND VERY EDUCATIVE