


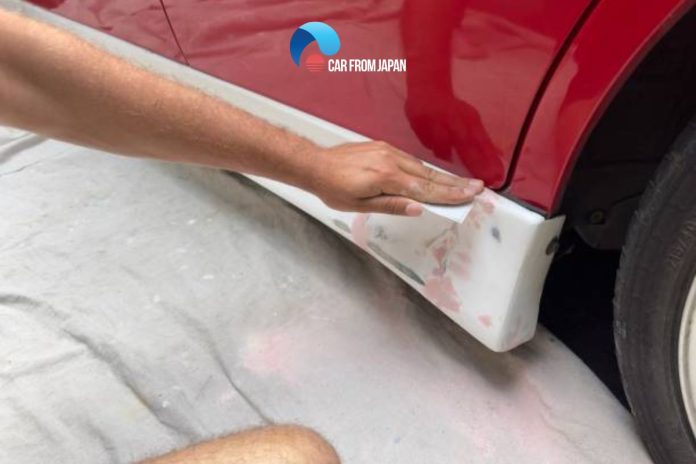
Fiberglass is tough, but it’s not unbreakable. Whether you have a crack on your boat, a hole in your RV, or damage to a car panel, fixing fiberglass yourself is actually easier than you might think. You don’t need to be a professional! This step-by-step guide walks you through using a standard fiberglass repair kit simply and clearly, ensuring you get a strong, smooth fix that will last.
Contents
What Is A Fiberglass Repair Kit?
A fiberglass repair kit for cars is a collection of materials and tools specifically designed to repair damage or cracks in the fiberglass components of a vehicle. The main task of this repair kit is to fix various fiberglass components in a car, such as body panels, hoods, bumpers, fairings, and other parts made of fiberglass material.
Typically, a fiberglass repair kit will include some components:
- Fiberglass cloth or mat: These are sheets of woven or non-woven fiberglass material used to reinforce the repair area.
- Resin: The repair kit usually contains polyester or epoxy resin, which acts as the adhesive and bonding agent.
- Hardener: A catalyst or hardener is included to mix with the resin, initiating the curing process.
- Mixing container: A container for mixing the resin and hardener.
- Applicator tools: Tools like brushes, spreaders, or rollers are provided to apply the resin and fiberglass cloth.
- Sandpaper: Different grits of sandpaper may be included to sand and smooth the repaired area.
- Gloves: Disposable gloves are often included for safety and to prevent direct contact with the resin.
- Instructions: Most kits have detailed instructions or a user manual to guide you through the repair process.

Repair Fiberglass
To know its use, you first have to know about the materials that come with a standard kit and the additional items you may need for repairing the crack or hole.
Materials in a fiberglass repair kit
- Fiberglass resin
- Hardener
- Plastic spreader
- Fiberglass cloth
- Mixing stick
- Mixing tray
Additional Items Required for the Project
- Acetone or lacquer thinner
- Sandpaper 80 and 180 grit
- Sanding block
- Measuring cup
- A paintbrush
- Rubber gloves
- Scissors
How To Use A Fiberglass Repair Kit To Fix A Damaged Area
Let’s take a look at our fiberglass repair guide with the step-by-step instructions:
Step 1: Cleaning the damaged area
Use acetone to clean the damaged area. If you don’t have it, soapy water will also be useful for removing dirt, oil, grease, and other ingredients. Let it air-dry completely or use a piece of dry cloth to wipe the area.
Step 2: Sanding the damaged area

Use the Sandpaper 80 grit to sand the damaged area. It will remove all the rust, paint, primer, and gel coat. Sand the other side of the damaged spot too, because repairing both sides will strengthen the surface. Clean the area again with acetone or soapy water.
Step 3: Make a resin and hardener mixture
Cut several pieces of fiberglass cloth one inch larger than the cracked or holed area. Then mix the resin with the hardener in the mixing tray. Blend in small amounts and remember that the working life of the mixture will be nearly 8 to 12 minutes at 75°F. You have to use ten drops of hardener for one ounce of resin.
Step 4: Apply a coat of the mixture
Use the paintbrush to apply a coat of mixed resin on the damaged area. The resin should cover the area that extends 2 to 3 inches beyond the repair. Then, place a piece of fiberglass cloth onto the damaged spot and saturate it with the mixed resin. Keep applying layers of cloth pieces and resin until the area is completely repaired. Follow the same procedure for both sides.
Step 5: Drying, then sanding the damaged area
Let the area dry properly. The curing will be better if the temperature of the place remains at 75°F. After that, sand the area with Sandpaper 80 grit. You can use a body filler at this stage to smooth the small curves.
Step 6: Sanding the contour of the repaired area
Use the Sandpaper 180 grit on the contour of the repaired area so that it blends with the rest of the surface.
Check out this video for more details about how to use fiberglass repair kit
Safety Precautions
When using a fiberglass repair kit, it’s important to take the following safety precautions:
- Work in a well-ventilated area or wear a respirator mask to avoid inhaling resin fumes.
- Wear gloves to protect your hands from direct contact with the resin.
- Follow the manufacturer’s instructions regarding the safe handling and disposal of materials.
- Avoid open flames or sparks in the vicinity, as some resins are flammable.
Now, your car is ready for the paint job. While using the fiberglass repair kit, always remember to use hand gloves while touching the fiberglass cloth and resin mixture. Besides, dump the unused resin because putting it back into the container will spoil the rest of it. Next week, we will show you more car maintenance tips, like how to replace Windshield or Easy ways to unlock your car. Thus, don’t forget to follow CAR FROM JAPAN to read more useful car information.






Great blog!
for some difficult shapes one can use pre-wetted strips of fiberglass o gradually build up the shape.