Your car engine generates power by creating combustions. It does this by first drawing air and fuel into the combustion chamber, then compressing this mixture, which will be ignited by a spark. The engine’s ability to compress the air and fuel mixture is important to the creation of such contained explosions.
However, over time as the engine ages, one or more of the cylinders might lose their ability to create pressure due to wear and tear to the cylinder wall, piston ring, or valve. Engine performance will suffer. And to check which cylinder is failing in terms of pressure generation and finding out the cause, you will need to perform a cylinder leak-down test.
The leak down test is handy, since you can test the cylinders that had low compression readings only, or you can test all the cylinders to check overall engine condition. In this engine maintenance article, we’ll focus on how to test the low-pressure cylinders only with a leak-down test.
What Is A Cylinder Leak-Down Test?
Compression Test: Pressure Reading
First, to understand what a cylinder leak-down test does, you have to grasp the compression test. They always go hand in hand and both are common tests on a car engine’s overall performance.
A compression test, as the name suggests, determines an engine’s ability to compress the air-fuel mixture. To do this, a pressure gauge is temporarily installed in place of the spark plug. The engine is then cranked to create pressure, and the gauge will produce a reading of the positive pressure created by the cylinder inside the combustion chamber.
Leak-Down Test: Air Loss Reading
The compression test can identify any cylinder that has a much lower pressure reading than the rest, which is a source of concern. To find out the cause of such a loss of compression, you will need to perform the cylinder leak-down test.
A cylinder leak-down test is basically a compression test in reverse. While the compression test measures the engine’s ability to create pressure, the leak-down test checks for the loss of air that leaks from the cylinder. To do this, you’ll need a kit called the leak-down gauge kit.
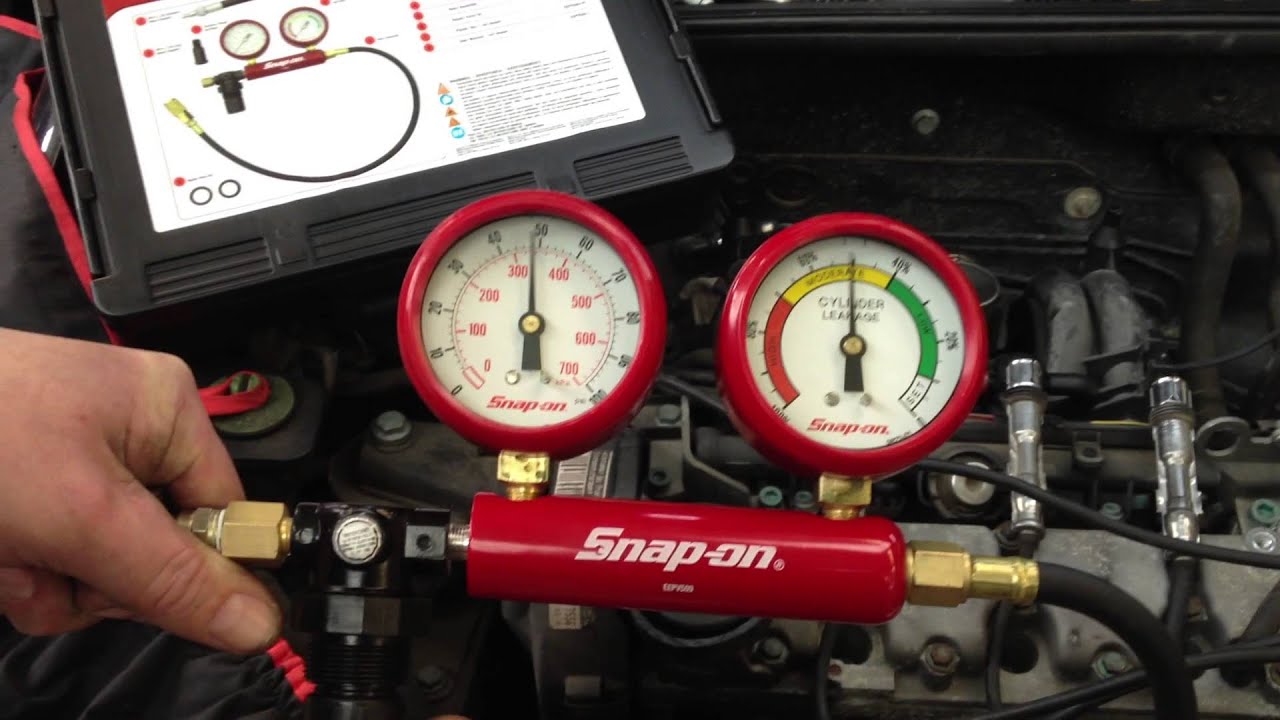
Compressed air enters the cylinder through the spark plug hole. One gauge on the tester measures the pressure of the air introduced into the cylinder and the other measures the percentage of the air escaping. There will always be some degree of loss, and the percentage will indicate the condition of the cylinder as well as the overall performance of your car’s engine.
The beauty of the cylinder leak-down test is in addition to telling you the overall health of your engine, it is very useful in troubleshooting the sources of problems so you can try to have the problem components fixed before tearing down the engine and getting a rebuild. After the step-by-step guide on how to perform the leak-down test further down below, you will learn how to listen to the sources of the problem.
You can isolate the culprit just by listening for where the air is leaking by ear. It can be due to worn rings, a leaking head gasket, or the intake or exhaust valves being stuck open.
What The Reading Indicates
In reality, no engine will have zero loss of compression, which must be achieved with absolutely perfect sealing. An engine in good to excellent working order will have from 5% to 10% air loss. A leak-down percentage of between 10% and 20% means it might be time to keep an eye on your engine as it’s nearing old age, although it can still function.
In general, even cylinders with 20% air leak do not represent a major loss of engine power. If the leak-down percentage is less than 20% and most of it is past the rings, an engine rebuild is not going to gain you significant engine power. If the loss is higher than 20%, you might consider tearing down the engine and giving it a rebuild.
If your engine measures 30% or more for each cylinder, and it’s all running past the rings, then your engine definitely needs to be retired and rebuilt.
In addition, a healthy engine should have a relatively consistent percentage of leakage across different cylinders. If the cylinders perform within a couple of percentage points of each other, do not be alarmed and look elsewhere for any perceived problems.
For instance, if you get 15% to 18% leak-down on all cylinders, your engine is in an OK shape. If one or more cylinders approach the 20% mark and are markedly higher or lower than the others, it should indicate that there’s a problem with these cylinders.
READ MORE
- How Much Does It Cost To Replace A Cylinder Head?
- Is It Safe When Driving With A Misfiring Cylinder?
Listen for The Source of Air Loss
- Piston rings: Piston rings and cylinder walls are subject to wear and tear, and can let air leaks through. If you hear hissing out of the oil filler cap hole, dipstick tube or the positive crankcase ventilation (PCV) valve, then the air is leaking past the rings. This is due to either wear to the piston rings or cylinder walls or both.
- Cracked cylinder head: If the cylinder head or cylinder walls develop any crack, air will escape into the coolant. You will see air bubbles in engine coolant or coolant being pushed up out of the radiator neck.
- Head gasket: If you see air bubbles in engine coolant at the radiator filler cap, then the leak is past the head gasket.
- Exhaust valve: If the leak is in the exhaust valve, you will hear air hissing out of the tailpipe, turbocharger or exhaust manifold.
- Intake valve: If there’s a leak at the intake valve, you will hear air whistling out of the intake, throttle body or carburetor. A leak at the intake valve is the most serious type of compression loss. If the leak-down test identifies a loss percentage of more than 20%, try tapping on the intake valve with a plastic mallet to see if this will reduce the leakage. If the leak persists, it might be worth the time to take out the cylinder head and repair the problem.
How To Perform Cylinder A Leak-Down Test: Step by Step
You will need a leak-down test gauge kit, spark plug socket, a shop air compressor (to create compressed air), basic car maintenance hand tools, and something to record results. Leak-down test gauges differ and can return slightly different readings. This is not a source of concern, as long as you consistently use the same gauge and the inlet shop air pressure.
Step 1
First, warm up the engine, so the rings have a chance to seal.
As mentioned, in the leak-down test, compressed air will be introduced to the cylinder through the spark plug hole. So you’ll need to remove the spark plug for the cylinder you’re testing. But leave the rest in place.
This is because when pressurized air enters the cylinder, the engine will usually turn over. Leaving the other spark plugs in lace will help provide some resistance to turning.
Then, rotate the engine over by hand until the piston in that cylinder is at top dead center (TDC). You’ll need a breaker bar or long handle ratchet and socket to turn the crank nut.
* Important Notes For Accurate Result: Before using the shop air pressure to introduce compressed air into the engine, the cylinder being tested must be placed at Top Dead Center (TDC).
That is the piston must be at the top of its travel, the intake and exhaust valves must be closed, and the crank, rod, and piston are as vertical as possible. When compressed air is sent into the cylinder, the leak-down tester will measure any loss of air escaping past valves or piston rings. If the cylinder is not at TDC, air will escape past an open valve and the gauge will return a misleading number.
Furthermore, it’s dangerous if the cylinder being tested is not perfectly on TDC. In this case, the engine will turn over quickly and the breaker bar can strike you or damage under hood components. So for your safety, remember to remove the breaker bar and socket from the crank nut before introducing compressed air into the cylinder.
Tip: Insert a long screwdriver or extension into the spark plug hole and turn the engine by hand with a socket on the crankshaft. When the screwdriver stops rising or falling, you’re at TDC. If you go past TDC, do not turn the engine backward but go around again. In a four-cylinder engine, two pairs of cylinders are at TDC at the same time: cylinders one and four, and cylinders two and three.
Step 2
Remember to double-check that your leak-down gauge reads “zero” before you start by turning the regulator counterclockwise to zero the incoming pressure. Then connect the shop air pressure to the inlet side of the gauge and the gauge’s air-fitting adapter into the spark plug hole.
Put your car in gear and set the parking brake to prevent the engine from turning when compressed air enters the tested cylinder. Turn the regulator clockwise to let compressed air enter the cylinder.
Note that when the leak-down gauge reads “zero”, the shop air pressure gauge will read current shop pressure. This can range from 60 psi to 100 psi, and it needs to remain constant and steady for the leak-down test to produce an accurate reading.
Step 3
Record the cylinder’s leakage percentage. Remove the oil dipstick, radiator cap, oil filler cap and air cleaner. Open the throttle body, then inspect and listen for the sound of air whistling or hissing. Where the air is escaping is the source of the loss of compression. Now you can disconnect the leak-down gauge and proceed with any remaining low-pressure cylinders using the same steps.