
Dents, scratches, chips, and other things caused by small accidents are just unavoidable. Nonetheless, these are minor problems as a careful car paint scratch repair can make them nearly invisible.
The car paint is a clear-coated catalyzed enamel that is hardened by different types of toxic chemicals. Let’s see how to fix deep scratches or chipped paint in 3 ways below.
Contents
- Doing Car Paint Scratch Repair: The 3 Easy Ways
- FAQs on Car Paint Scratch Repair
- Why do some scratches seem to “disappear” in the rain but reappear in sunlight?
- Is it better to use a polishing compound or rubbing compound for scratch repair?
- Why does a DIY touch-up sometimes make a scratch look more noticeable?
- What’s the risk of “chasing” a scratch too aggressively with sandpaper or compounds?
- Can heat guns or hair dryers really reduce the appearance of scratches?
- Why does a scratch sometimes look worse after washing the car?
- Sum Up
Doing Car Paint Scratch Repair: The 3 Easy Ways
Car scratches are divided into 3 types: deep scratches, small scratches, and surface scratches. So how to fix paint scratches on car?
Do not worry, with each type of car scratch, we have a specific way to fix it. Now here we go!
Using paint to fix deep scratches on the car
Deep scratches will get worse and worse if you repair them by using the wrong fixing method. To help you know how to fix a scratch on a car at home, here are 6 easy steps of DIY car paint scratch repair to do.

Step 1: Washing and drying the car carefully
In this step, all you need is to wash your car thoroughly in order to remove all the debris and dirt.
You have to pay more special attention to the scratched area that you are going to repair. Wash this area very carefully to make sure that it is extremely clean. Then use microfibers to dry your car.
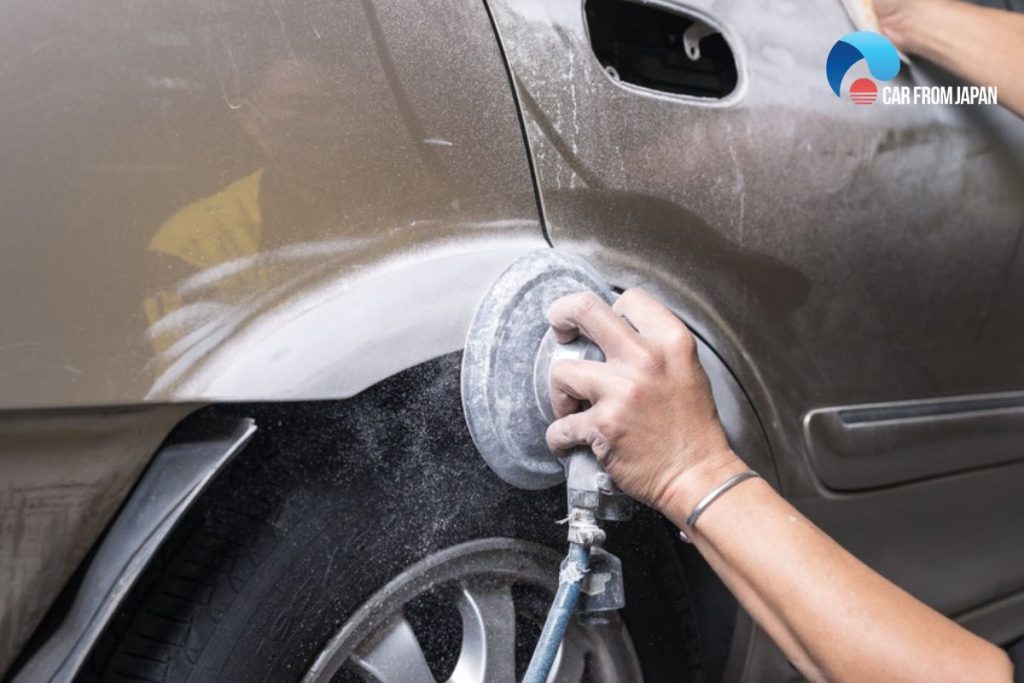
Step 2. Sanding the scratched area
The second step of car paint scratch repair is sanding the scratched area. The purpose of this step is to strip away the top paint layers.
Use 2000-grit sandpaper to sand the scratched area in about 10 to 15 seconds then check the area to know whether you need to sand deeper or not.
Notice:
- You should always sand the scratched area in that direction.
- You can rinse the scratched area with water if necessary to check your process
- Use 150-grit sandpaper if the scratch on your car is slightly deeper than the car’s clear coat
- You should make sure that there is no dirt or debris between the vehicle and the sandpaper as this will result in scratching.
Step 3: Rinsing and drying the area
The next step of car paint scratch repair is rinsing away the dirt and debris left after sanding the scratched area. Then a clean microfiber is needed to wipe the car surface.
Notice: Using dirty or old rags in this step is avoided as these could result in more scratches on your car’s surface.
Step 4: Spraying a few primer coats onto the sanded areas
After sanding the scratched area, spraying some primer coats is the next thing how to repair car paint scratches to fix deep scratches on the car.
Spraying the primer coats on the paint in a back-and-forth motion is what you must do. Then, you should wait from 5 – 10 minutes for the primer coat to dry and then spray another layer.
Notice: If possible, you should choose a primer that is close to your car paint color.
Step 5: Applying a few paint coats matching your car color
The next step of deeper car paint scratch repair is painting the same color paint where you applied the primer.
It is recommended to wait from 5 – 10 minutes between each time, therefore the paint will dry completely.
Step 6: Waxing the repaired area to seal the paint
The last step of car paint scratch repair is waxing the repaired area to seal the paint.
After painting your car with a few paint coats, it’s time for you to wax the painted area to seal the paint. Use a microfiber cloth or a buffer pad to apply carnauba wax onto the car surface then start buffing the area.
A waxing kit can be easily bought at any automotive shop and often includes everything you need for car waxing purposes like wax, microfiber cloth, or a buffing pad.
Notice:
- To do this job in the best way, you should press down on the microfiber towel or buffing pad with medium pressure then move them in circular motions.
- Keep waxing until you observe the car surface looks shiny.
How to remove deep scratches from car paint? Let’s find out in this video!
Removing small scratches by using a scratch removal product
According to auto experts, using removal products is the best way to help you remove annoying small scratches on your beloved car. So let’s check out this method right now.
Step 1. Washing your car
Before doing the car paint scratch repair process, first of all, you should wash your car to make sure that there is no debris or dirt in the scratch.
Cleaning the scratched area carefully before applying any removal product is very important as any debris or dirt left on the car paint when buffing will result in more scratches.
Use automotive soap and microfiber towels or sponges to clean the car. Then dry it with microfiber towels to get ready for the next step.
Step 2: Purchasing a scratch removal product
You can get a scratch removal product or kit at auto supply stores. These removal kits often include the solution for scratch removal and a buffing pad for applying the product.
Step 3: Applying a quarter-sized dollop of scratch removal product to the pad
The amount of scratch removal product applied to the pad will depend on the size of the scratched area.
Squirt the scratch–removal product onto the microfiber cloth or buffing pad, then you fold it in half to work the scratch-removal product around the surface of the cloth or pad.
Step 4: Working the removal product into and around the scratched area
In this step, you can work the product in a back-and-forth motion or a circular motion. You should choose which type of motion is the most comfortable for you and also covers the scratched area best. But notice that you should not switch directions.
Don’t change from going back and forth motion into circular motion when working the removal product. Make sure that the removal product is well-distributed on the car paint surface.
Step 5: Rinsing off any product residue
When the buffing scratched area procedure is done, next is rinsing off any product residue. A clean microfiber cloth is needed to wipe away any excess product.
Notice: You should not let the removal product residue dry on your car’s surface.
Step 6: Repeating the process from 2 to 3 times if necessary
If you observe that the scratches are still visible, you can repeat the above process from 2 to 3 times.
Notice: Don’t do this process too many times as you can ruin the clear coat on your beloved car.
Watch the video below to see how to fix small scratches with car removal products:
Doing surface car paint scratch repair with a tube of toothpaste
Surface scratches are the easiest scratches to repair. With only a tube of toothpaste, fixing these ugly scratches is under your hand.
Step 1: Inspecting the damage level of the scratches
First of all, you should check whether the scratches are surface or not by using your fingernail. To do the check, you run your fingernail over the chips, scratches, or dents.
If you find out that your fingernail doesn’t catch any scratches, which means that the scratches on your car paint are not so terrible, therefore using toothpaste to fix them may be a good method.
Step 2: Cleaning the scratched area
Before applying toothpaste to the scratches, you must wash the damaged area and then dry it.
Why do we have to wash and dry the scratched area? Well, the answer is that rubbing debris and dirt into the scratched area will make the scratches become worse.
To clean your car, you can take it to a car wash or simply wash it yourself. If you wash your car at home, you should use a hose spray all over the car to remove the majority of the debris and dirt.
Next, apply automotive soap to your car by using a car-washing brush or a large sponge. Use them to wipe all surface of your car, you should make sure that all the car surface is covered by soap.
After that, it is time to spray it off by using the hose. Then use a dry, clean towel to dry your car.
Step 3: Applying a quarter-sized amount of toothpaste to a dampened microfiber towel
In this step, using whitening toothpaste is better than other types of toothpaste to remove the scratches. But if you don’t have this type, you can use any toothpaste you have on hand.
Note: You need to apply enough toothpaste to a clean, soft, microfiber to ensure that when you rub the scratches this way, the process does not cause more damage.
Step 4: Rubbing the toothpaste into the damaged area in a circular motion
You move the microfiber towel in small circles on your car paint to buff out the scratches. Keep doing this until the toothpaste is well-distributed on the car paint.
Applying the toothpaste will require you to use some pressure, but not too much.
Read More: Let’s find out what causes rusts on car?
Step 5: Rinsing off any excess toothpaste
When buffing out the scratches is done, the next to do is spray thoroughly with a hose to remove the excess toothpaste. Then use a microfiber towel to dry the area.
Step 6: Repeat the whole process up to 2 times
Using toothpaste to get rid of surface scratches may not be effective the first time. You may need to repeat the whole process 1 or 2 more times if necessary. Then check the damaged area to see whether the scratches are still visible or not.
Notice: You should not do the process more than 3 times as if you do the process too many times, you may ruin the clear coat of your car paint.
Want to know how to do surface car paint scratch repair with toothpaste? Let’s find out in the below video!
FAQs on Car Paint Scratch Repair
Why do some scratches seem to “disappear” in the rain but reappear in sunlight?
Water fills in the grooves and reflects light uniformly, masking the scratch temporarily. Once dry, the light catches the uneven surface again, revealing the damage.
Is it better to use a polishing compound or rubbing compound for scratch repair?
Depends on the depth. Rubbing compounds are more aggressive and remove more clear coat.
Polishing compounds are safer for light defects but won’t help deep scratches.
Why does a DIY touch-up sometimes make a scratch look more noticeable?
Because mismatched paint, uneven application, or failure to sand/polish the area properly can leave a blob or dull spot that stands out worse than the original scratch.
What’s the risk of “chasing” a scratch too aggressively with sandpaper or compounds?
You could burn through the clear coat or even into the base paint, especially with machine polishers. Always measure paint thickness if possible and go slow.
Can heat guns or hair dryers really reduce the appearance of scratches?
Sometimes, yes — on plastic surfaces like bumpers. Gentle heat can make shallow scuffs fade by reflowing the plastic slightly, but it won’t help with painted metal panels.
Why does a scratch sometimes look worse after washing the car?
Because dirt and oxidation can temporarily hide clear coat damage. A clean surface exposes the true depth and length of the scratch, making it more visible.
Sum Up
Hopefully, after reading you will get professional knowledge to do car paint scratch repair by DIY methods.
If you have any questions related to car paint scratch repair or any questions about car maintenance tips, feel free to leave us a comment below. Our car experts will answer these questions for you.
Very much keen your articles. Lookibg forward to more.