
Every car owner always wants their car to look good and style by time. But the car paint is sometimes hard to change and it may be expensive. That is why many people are looking for an alternative method that is vinyl wrapping. Let us show you what is wrapping a car and how to vinyl wrap a car.
Contents
What Is Vinyl Wrapping?
Long time ago, people started using vinyl for custom lettering, logos, and decals but they never thought about wrapping a car with vinyl. Then in 1993, as the idea came along, the first vinyl wrapping a car was well done and it is a taxi. By that, vinyl wrapping a car became a trend in the world.
So vinyl actually is polyvinyl chloride (PVC), the world’s most versatile plastic. Vinyl is composed of two simple building blocks: chlorine, based on common salt, and ethylene, from crude oil. Because of its compound, vinyl is really flexible, resistant to ultraviolet light, and adds color. These ingredients are blended, cast onto moving sheets, then baked and cured.
As the development of technology, the vinyl layer today is really thin, about 2 millimeter. After adhesive application, vinyl car wrap sheeting may be cut into smaller rolls, for individual consumers, or sent to printers, for custom graphics as simple or as complex as you can imagine.
Vinyl Car Wrap Technology?
So before going to “ how to vinyl wrap a car”, let us introduce to you the vinyl technology. Since vinyl is a flexible material and easy to add color, it is no longer expensive to customize the color of the car if you want like in the past. In the professional route, vinyl car wrapping can cost as much as a paint job, but patience and a steady hand can make even a full car wrap go smoothly for a diy car wrapping. In general, the tools required are easily accessible and require no special licenses, training, or experience.
After wrapping the car with vinyl, with careful use, the vinyl layer can last for 7 years or even 10 years. For performance, this may be undesirable. But usually, people would love to change the color of the car every 2-3 years. Other than that, it is also easy to remove the vinyl layer when you do not like it anymore since it requires a couple basic tools and supplies and it does not affect the original paint color. The original color actually can last for longer and be less damaged than the usual.
So now, let’s move to the step by step of how to vinyl wrap a car!
5 Easy Steps To Vinyl-wrap a Car
Vinyl wrapping a car will be easy for someone who is a professional in this major. But it will be a little difficult if you are new to it. In most cases, people find out that it is easy to make bubbles, tears, stretch marks or wrinkles… So if you are not sure about how to do it, read carefully the 5 easy steps of how to vinyl wrap a car. You will find that even if you do it yourself, you can get great results. Ready to start?
An important note: Choosing a good place to wrap your car is something you must keep in mind. You do not need to go to a medical research cleanroom but a clean room will help to keep dust from the tools and material, which can reduce the chance to get the dust on your new vinyl layer.
What Do You Need?
Vinyl (color you want)
Heat gun
Gloves
Cutting tape
Cutting blade
Squeegee
Measuring tape
Infrared thermometer
Step 1: Clean The Car Paint
This step is a really important step that you MUST DO carefully in order to get a smooth vinyl layer. So consider your canvas and the surface which you are going to wrap. The small scratch will not ruin your vinyl layer but the chips, dents, gouges will.

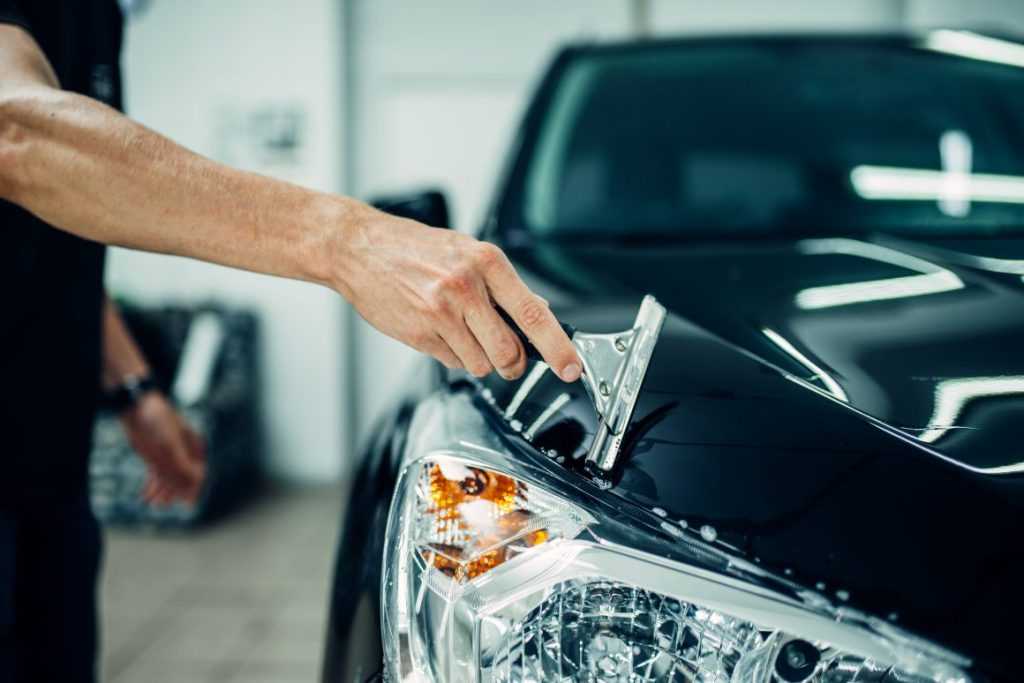
You should use non car wash products which help to leave a clean surface to which vinyl wrap will readily bond. Then clean the entire surface of the car with isopropyl alcohol and microfiber towel. There are some parts of the car which you should care more about than usual before diy car wrapping. They are emblem, mirror, door handle , antena, headlight… These parts will increase the difficulty and time required to get a good vinyl.
Step 2: Mark The Problem Area On The Car Paint
It is important to know if your car has any problematic part before applying vinyl. Each imperfection will be magnified by the vinyl and no matter how perfect the project goes, you will always notice the imperfections. Mark the problem area on the surface of the car to adjust the application procedure for curves or problem area. Then it is necessary to solve any problem before applying the vinyl.
Step 3: Take Measurements And Cut
The third step on “how to vinyl wrap a car” is taking the measurement and doing the cutting job. When you do the measurements, remember to add 4-6 inches. You can easily trim as you go but you can’t add vinyl if you already cut it. Other than that, you will need to neatly tuck your corners for a professional looking finish. Measure plus four. Last but not least, you may need to use more than one piece for oversized surfaces such as hoods, trucks or roofs.
Generally, in the market, vinyl is sold at 1.52 * 18m or 1.52 * 28m. Meanwhile, 10-23 meters are needed to wrap a complete car. You can estimate that it will consume 1 or 2 rolls. Then measure the surface of your car and cut the size.
Step 4: Lay The Wrap
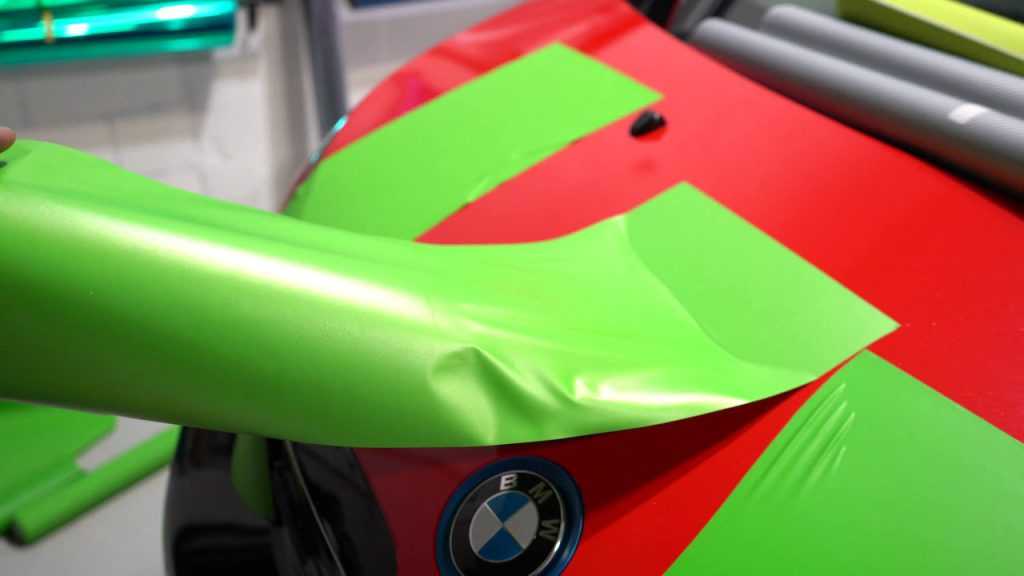
So you already have a clean car surface and vinyl already is cut. The next step is peeling and laying the wrap. The vinyl can get a little unwieldy and do not want it sticking to itself. Make sure your hands are clean and get to peeling.
So to avoid the bible which is caused by the air, strat from the middle of the panel. Then go to the outside edges. Take your time since hurry can ruin your work.
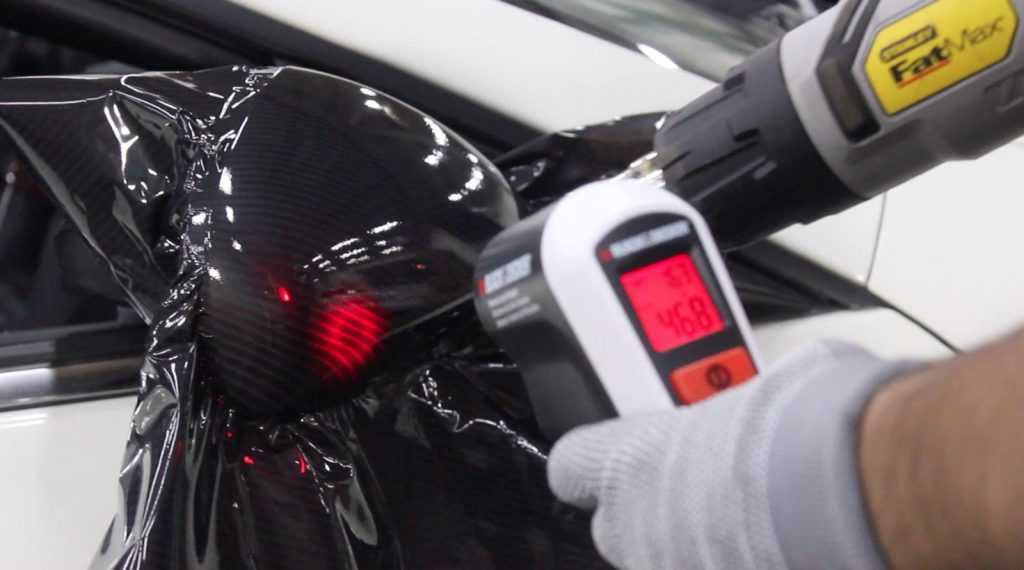
Now, it is time for squeegee and heat gun. Take the squeegee and apply even pressure working in the same pattern when you applied with your hands from the middle to the outside. The heat gun now can help you determine any bubble. Apply the heat gun, the bubble will appear if you have any trapped air. Don’t cut any excess until you’re positive there are no air bubbles. This will help if you need to lift the vinyl to remove any air you can’t smooth out.
Step 5: Edging And Finishing
After everything is set, you should cut off the excess material. It is the step 5 of how to vinyl wrap a car. Be careful at this step since the painting is under your cutting blade. If you cut your paint, there is no way to save the vinyl. You have to remove the vinyl, cure the paint and do it again. Then, you can use the heat gun to release some tension but be sure not to overheat the material – you want just enough heat to soften it up a bit and smooth out any wrinkles.
The heat gun also can help to set a good finish. Apply it evenly across the vinyl which will draw it to the surface of the car. It is important to make the vinyl stick strongly to the car surface. So use the heat gun again until you are satisfied that the vinyl is strong and set, clean the surface with some alcohol and inspect your work.
Pros And Cons Of Vinyl Wrap
So we just answer your question about how vinyl wrap a car. With these 5 steps, you can follow and help your car to wear a new look. Wrapping a car by vinyl has also benefits and drawbacks. So what are they?
Pros Of Vinyl Wrapping
First of all, a vinyl layer will give your car a new look. For someone, going with the same car, same color for 4-5 years is too much. And they want to give it the new look so vinyl is a good choice. It is suitable for young people, old people and you do not need to worry about being out of date. The diversity of colors will make you satisfied.
Cost for vinyl is lower than painting. Compared to a good quality paint job, a full vehicle wrap will cost a fraction of the price.
Vinyl is also removable. So if you want to go back to the original paint, it is an easy job. This allows you to change the look of your car more often.
Vinyl is also a protectant to your paint layer.So when it comes to reselling your car, you can remove the vinyl to reveal the pristine paint underneath. You also can custom the vinyl with the digital design then print and apply to your car.
SEE MORE:
- A Breakdown Of The Cost To Wrap A Car
- DIY Car Interior Cleaner Guide – Make Your Vehicle Sleek And Shine!
- Everything You Need To Know About How To Wrap Your Vehicle
The Cons Of Vinyl Wrap
For sure anyone who wonders how to vinyl wrap a car now also wonder the downside of the vinyl wrapping. Here are what we prepare for you: the cons of applying vinyl to your car!
The quality of vinyl is determined that it is good and can last for even 10 year if you care about it. But is it good as paint in deep? The answer is no, the paint is still the number one quality layer to your car.
Wrapping your car requires a lot of patience so even if you are professional, it is still difficult or possible to make a mistake. As the vinyl is applied, it needs to be cut. A professional will do this without damaging the original paint while an amateur can leave cut marks and scratches in the finish of your car.
Not all vinyl is created equal. The high quality vinyl can help your car last for long but the low quality vinyl will give up soon. So when applying the vinyl, you should choose the high quality vinyl to save your wallet in the future.
Sum Up
We have just introduced to you how to vinyl wrap a car. You can easily do it at home or can bring it to the mechanic. A specialist knows what should do with your car. Since wrapping your car with vinyl requires a lot of patience and meticulousness, set a day off for that job and do not forget to carefully read 5 easy steps of how to install vinyl wrap.