The first thing you think of when your car needs “tire balance” is taking it to trusted mechanics. And you just need a small budget of about $15 – $80 for balancing tires.
However, what else is great when you can DIY tire balance? If you have a basic knowledge of the mechanic and want to save money, we’re sure that this topic is right for you.
Let’s find out how to balance tires at home!
Contents
- Is A Tire Balance Really Needed For Your Car?
- How To Balance Tires At Home?
- When Do You Need To Balance Your Wheel?
- FAQs on How To Balance Tires At Home
- Why does my tire feel balanced until I hit highway speeds?
- Can I reuse the existing wheel weights if I’m rebalancing my tires?
- How can I tell if tire vibration is from imbalance or something else (like a bent rim)?
- How accurate are bubble balancers compared to shop-grade dynamic balancers?
- What’s the weirdest sign of an unbalanced tire that people often ignore?
- Final Words
Is A Tire Balance Really Needed For Your Car?
Over time, the wheels may encounter some problems that cause the vehicle to vibrate and be difficult to control.
At this time, tire balancing is a corrective action to help your car work more stably and safely. Wheel assembly consists of 2 main parts: rubber tire and rim.
The wheel is considered to be in balance when the weight of the rubber tire and rim is evenly distributed around the axle.
However, the tire manufacturing process may not guarantee this balance is perfect. Or after a long time of use, especially often traveling on bad terrain, the wheels will soon appear unbalanced.
Or after a long time of use, especially often traveling on bad terrain, the wheels will soon appear unbalanced. These causes cause the wheels and steering wheel to vibrate, creating an unstable and unsafe driving feeling.
Therefore, the tire balancing method was developed to overcome this situation. Tire or wheel balancing is the process of balancing the weight of tires and wheels so that it spins smoothly.
Balancing involves placing the wheel and tire assembly on a balancer, setting the center of gravity of the wheel, and rotating it to identify the position of the weight.
To balance the tires, it is necessary to use a tire balancer, measure the weight of the unbalanced part and then add weights of lead on the opposite side. This helps limit the vibration of the steering wheel that affects the driver’s control of the car.
Wheels after being balanced will have higher durability (even wear in positions; no rollover; no effect on other details such as bearings, wheel axles, and steering wheel), helping to improve quality steering.

How To Balance Tires At Home?
Balancing wheels at home can help you save from $10 to $50 or more depending on service centers and you don’t want to take your time to visit mechanics.
If you already have a background in mechanical. Why not give it a try? In this section, we will divide it into 2 ways in case you have a balancer and in case you don’t have this tool.
Whatever the case, you don’t need a lot of specialized tools to balance your own tires. Let’s get started!
Balancing a tire at home with a bubble balancer
Bubble balancers are known as static balancing. This is a good method and you can do it at home.
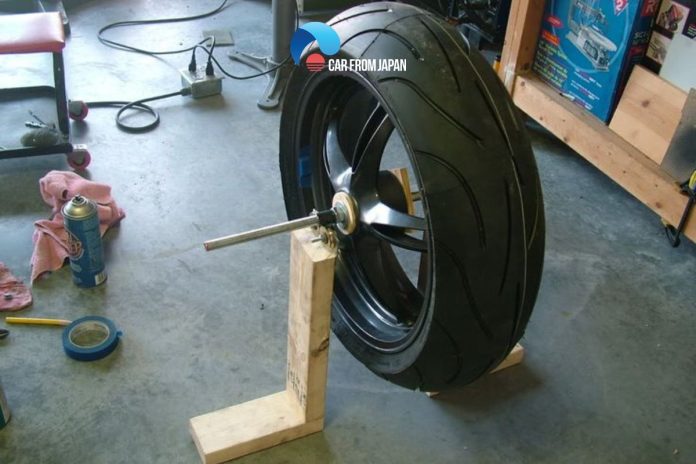
All you need is a balancer or a spindle and some basic tools. This method uses a non-moving balance post or a rotating shaft on which the tire is placed on the wheel surface.
In the center of a pillar are a small bubble and a balanced circle. All the setup makes sure to put a bubble in the circle. If a bubble is not in the middle of the circle, you can take a screwdriver to gently adjust it.
When the wheel is in an unbalanced state, that will be shown in bubbles and drivers can adjust by adding weights to the rim to create balance.
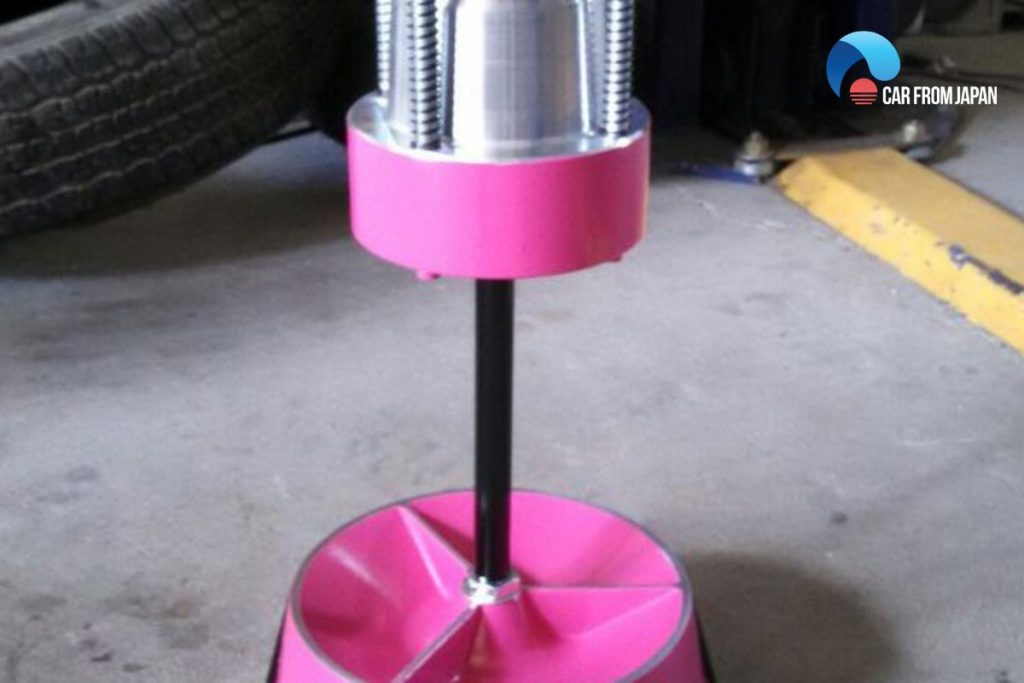
Starting with detailed steps on how to balance tires at home.
Step 1: Take the wheels off your car
This is the first step that almost all methods must do. When removing tires, drivers should follow the rule of removing and installing wheel screws diagonally, ie star wing, not rotating the order in a clockwise direction.
This method will help the wheel not be deflected to one side, but steadily in and out in all directions.
Step 2: Remove any weights or dirt on your wheels.
In this step, don’t forget to remove the weights currently put on your wheel to turn the wheels into a blank state.
Before you put the wheels into the balancer, if it’s a used tire on your wheel, you should inspect the tires to make sure there’s no rock or any other objects stuck in the threads and remove them.
Because it can affect the result of balancing, it will add more weight. We need to clean the surface with isopropyl alcohol or some specialized washes to make sure the whole inner edge is clear.
Step 3: Place the assembly wheel on the balancer device
All you need to do in this step is to follow the instructions that are attached to the balancers to set it up.
When balancing a heavy wheel, you don’t really have any problem, but with a light wheel, sometimes it doesn’t push all the way down so just push the wheel down and make sure it’s fully on the balancer.
With this method, it will take you a little time to wait for your wheels to settle into a balanced position or stationary.
Step 4: Identify the bubble direction
After waiting for your wheels completely stop by naturally. We will find out where the bubble is on the actual wheel itself.
If the bubble is off-center, and it’s pointing out in a certain direction. It means that there’s less weight in that direction on your tire.
It’s a good indicator to tell you where weights need to be applied. Once you’ve discovered the tire is out of balance, you can use chalk or marker to mark the points to put more weight on.
Step 5: Put weights and inspect again
What we’re going to do in this step is slowly drop on weights until the bubble is in the middle. You can just stack them around when the bubble is positioned perfectly in the middle.
We will know exactly how many weights to tape on. Each of the weights is only a quarter of an ounce. Follow the enclosed instructions to attach the weight to the specified position.
During this process, you need to make sure the weights are attached properly and firmly so that they do not come off when the vehicle is traveling at high speed.
After placing the additional weight on the wheel, you need to double-check that the tire is completely balanced. Return the wheel to its original position and start a safe driving journey!
How to balance a tire at home without a balancer?

Balancing without a home tire balancer: Is it possible? Our answer: It can be doable, however, the process can be a bit more complicated than using a static balancing method and may not give you the results you want.
Just like the static balancing method, you need to check all stones, nails, foreign objects stuck on the tread surface. You also need to remove all weights that are mounted on the rim.
A special feature of this method is that you will not need to remove the wheel from your vehicle because this technique is simulated based on the dynamic balancing method.
Instead, you would locate the approximate 12 o’clock position on the tire and use chalk to mark the position. You will then attach a weight to the marked position.
Accelerate your car to a speed that begins to vibrate and slowly increase the speed (about 5 mph). While it is vibrating, attach a new weight about 45 degrees from the marker. You continue doing this until there are no points with a higher vibration rate.
If there is still vibration, rotate the wheel another 45° and redo this process. It will help you find the position you need to add the extra weight and complete the balance!
Related Post: 5 Symptoms Of Unbalanced Tires In Your Car
When Do You Need To Balance Your Wheel?
According to the manufacturer’s recommendations, you should balance the tires around 7000 miles/time.
The best way to follow this rule is to have your wheels balanced every time you have a schedule to change the engine oil.
Besides the fixed schedule, when you notice some symptoms below, it means that your car needs to be balanced:
- When your vehicle is driving straight on a flat road, you still have the feeling that the steering wheel is vibrating abnormally, or the body of the car is shaking uncontrollably.
- The tires have abnormal wear and tear
- When you do tire changes, tire rotation, tire patching, etc., you must definitely balance the wheels to help them stay in the most balanced position, to help tires operate smoothly, and to ensure safety on the road.
- When your car is changed from a normal valve to a tire pressure sensor valve, it is also necessary to dynamically balance the 4 wheels.

FAQs on How To Balance Tires At Home
Why does my tire feel balanced until I hit highway speeds?
Because even a small imbalance can go unnoticed at low speeds.
Home static balancing might fix low-speed wobbles but not high-speed vibrations, which need dynamic balancing.
Can I reuse the existing wheel weights if I’m rebalancing my tires?
Not recommended. Once removed, adhesive weights lose grip, and clip-on weights may not sit as tightly.
Use fresh weights to avoid fly-offs or poor balance.
How can I tell if tire vibration is from imbalance or something else (like a bent rim)?
If balancing doesn’t help and vibration persists even with perfect weight placement, the rim may be bent or the tire may have internal belt separation, not fixable by balancing.
How accurate are bubble balancers compared to shop-grade dynamic balancers?
Bubble balancers are good for static correction (mainly vertical wobble) but can’t account for lateral forces, meaning they’re okay for basic balance but not high-speed perfection.
What’s the weirdest sign of an unbalanced tire that people often ignore?
Uneven dashboard vibrations or noisy humming at specific speeds, many blame engine issues or alignment, but it’s often just a tire out of balance.
Final Words
What will happen if your tires are imbalanced? It’s not only a big threat to your safety when driving a car but also causes significant damage to other parts of your vehicle.
If you understand mechanicals because in most cases, drivers are always advised to go to the mechanic to finish this step.
Actually, balancing wheels is not a completely complicated problem. It will take you about 30-60 minutes to balance all 4 tires.
By the way, we want to note that you should balance all tires at the same time. If there is a problem with vibration, all four tires are usually balanced at the same time. The reason is that it is difficult to distinguish which tire is the cause of the vibration.
If only one tire is repaired, just rebalance that tire with our how to balance tires at home guide above.
However, when you are planning to balance your wheels at home, safety should be your priority!

