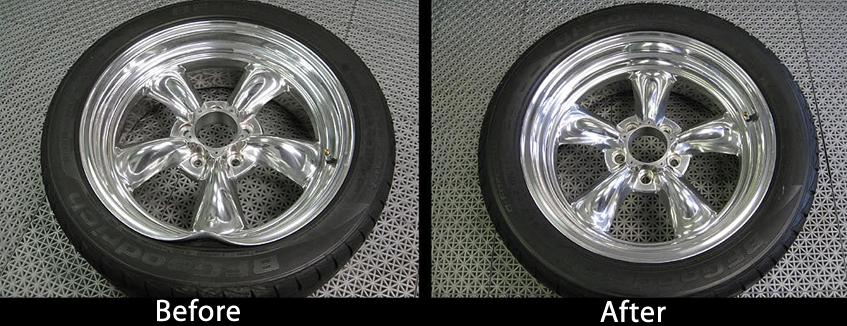
If you have prior knowledge of chrome rim repair, it may come handy anytime. Restoring chrome rim involves different steps.
If you see signs of scratch on your chrome rim, use good chrome rim paint or cleaner. To re-plate them properly, you need to use the chrome rim dipping method.
So what do you need and how can you fix a chrome rim? Let’s find out.
The Chrome Rim Repair Process
Necessary Tools and Materials for Chrome Rim Repair Restoration
In order to fix anything, you need the right tools and materials
- Small paint brush
- Buffing cloth
- Soft cloth
- Chrome rim paint
- Rubbing alcohol
Along with these tools, if you have a chrome wheel repair kit, the job will become much easier. The repair kit is the best tool when drivers want to fix minor damage, and it only costs around $50.
Remember to always get the kit for chrome rims, not the one for the wheel rim. The reason for this is that even though the kit said it can be used for chrome wheels, it is not as good.
Determine the Extent of the Repair
At the beginning of the chrome rim repair process, you need to detect the type of polishing in your rim. Tarnished rims mean aluminum has been used. So, get a suitable tarnish cleaner.
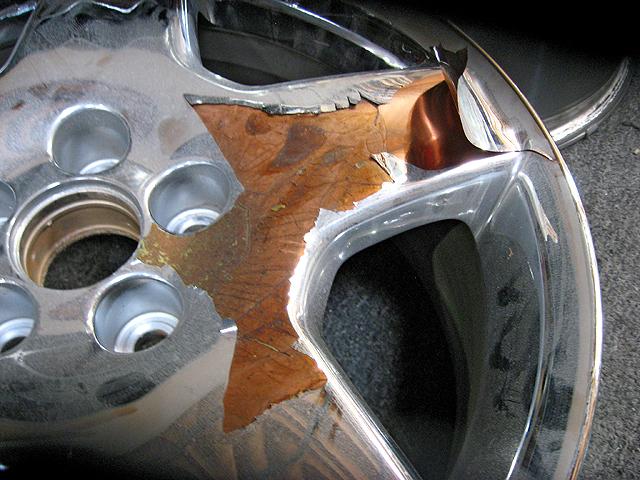
But when you are sure that it’s chrome, first, determine the extent. Then, you can simply clean the area to remove rust or dust. If there are scratch marks, then clean first and paint later.
Clean the Rims
The second step of the chrome rim repair process, we need to wipe any debris or dirt using a coarse rag. Now wet the soft cloth with the rubbing alcohol.
After that, use the soft cloth to wipe the chrome rims properly. Keep wiping until the rust goes away completely. To avoid scratching the chrome, never to use steel wool.

Touch Up Scratches
So what is the answer for the question of how to fix scratched rims chrome? By this time, use a good chrome paint to cover up scratches that appeared after cleaning the rims with rubbing alcohol.
This solution will give your car the chrome look, which might be disturbing for some drivers.
But if drivers are alright with it, they can save a huge amount of money, as well as provide a new life for your rims. Not to mention, car owners can change their vehicle’s outlook without buying new rims.
In order to touch up scratches, drivers need to plate the chrome rims over alloy wheels.
After that, they need to sandblast the rim with the purpose of removing the chrome plating, as well as exposing the underneath alloy wheel. And finally, we can use powder coating to coat the alloy wheels.
Paint can never be an exact match for that original metal look, but it is not noticeable unless someone gives a close glance.
On the other hand, if there is a scenario when you want to take off the whole chrome plating while still keeping the chrome outlook, you should contact a professional.
The reason for it is that you might affect your health, as well as pay a lot for replanting. To be more specific, the process of refinishing releases toxic waste, which is dangerous.
Also, you need to strip the rim, re-plant and mail the rims by using zinc, copper and chrome, which are very costly and complicated.
Use Epoxy for Gashes
Where there are gashes or deep dings in your rims, you can make use of a hard epoxy solution. By doing this, rivers can fill all the holes and scratches, following these steps:
As the first step, car owners should buff the hardened epoxy with the purpose of smoothing it out, along with the rest of the rim. The second step for drivers is to sand the epoxy with steel wool.
You can even use fine-grade sandpaper as well. In order to use spray paint and let it cling, you need to make it gritty.
Now you can spray the whole rim with chrome spray paint as the third step. Last but not least, drivers should use a soft buffing cloth or a buffer to buff the rim.

However, this should be done by experienced car owners. A chrome rim repair job is so easy that you can do it at home. However, it is necessary that you have the required knowledge.
This works on almost every damage level, new drivers might mess up when working with epoxy resin and make a disaster.
Your car’s chrome rims are vulnerable to scratches every time you go driving. This will save you some hard earned cash as well.
How to Repair a Leaky Chrome Rim
Alright, we knew how to fix scratched chrome rims. Now we will acknowledge the way to fix a leaky chrome rim.
Many new drivers think that alloy wheels and chrome are visually appealing. However, they have their corrosion issues that need to be taken care of, since they affect the tire.
Not only do they cause leaks on cars but also make soft tires. In order to prevent that happening with your dear vehicle, here is the way:
Determine the Leak Location in the Tire
The first step of fixing a leaking chrome rim is to find the location of the leak. There are various ways, but our recommendation is to inflate the tire with an air pump. You can even use a water bath and watch for air bubbles.
Remove the Tire
Now you have located the leak location, it is time to break the bead down and remove the tire. A tire machine is very useful in this situation, but if you don’t have one, tire irons are also acceptable.
After the removal, car owners should check both the inner and outer bead sealing surfaces. If there is any corrosion or damage, we need to fix it right away.
Buff the Bead Sealing
The following step is to buff the whole bead sealing surface of the wheel. Car owners need to do it carefully until there is no rust or corrosion left.
We recommend using a buffing wheel, or even a wire brush is fine. By using it, we can take off any debris or rust remaining.
Reassemble the Tire and Wheel
Ok, now you should remove the old stem in order to replace a new one there just in case there are any leaks coming from the stem.
After the installation, car owners should inflate the tire while watching the beads in order to make sure they seal properly.
Also, break down the beads before you add the sealer without removing the tire. You can put the wheel and tire back together and inflate it.
After waiting 10 minutes for it to dry, car owners can check one last time to see if the leak has disappeared or not. If the leak is still there, you can add more sealers will seal the deal.
Check out this video from 6th Gear Garage to learn how to complete wheel restoration!


