A windshield leak might sound like a negligible problem, it’s quite an annoying one and should be dealt with in time to avoid accumulation of excessive moisture inside your vehicle. Extra moisture can cause all types of headaches, from mold and mildew to constantly foggy windows, wet carpet and interior rust to the unpleasant musty smell. Fortunately, fixing a windshield leak is very easy and cheap, and you can do it yourself without help by a professional. It’s time you learn this basic car maintenance job.
Contents
How To Test Your Windshield For Leaks
If you have noticed wet carpets or condensation buildup in the cabin, the leak might be coming from a windshield or another window. To verify if your windshield is the true culprit, you’ll want to perform the simple “soapy water” test.
The Soapy Water Test
Dissolve some hand soaps or dishwashing liquids that can make a lot of bubbles. Use a sponge to douse the trim of your windshield on the outside in this soapy solution. Then get inside your car, use an air nozzle to spray or blow air at the trim around your windshield. If there’s a leak, the air nozzle will cause bubbles to form in the soapy water at the source of the leak on the outside of the windshield.
The Hose Test
While the soapy water test is safe for your interior in the case that the windshield is indeed leaky, the hose test can pose water damage to the inside of your car. You can use a hose or a powerful spray to spray water on your windshield, and have an assistant sitting inside the car to look for any sign of water dripping in from any spot around your windshield. If you opt for this method, it’s best to protect your vehicle interior in some way from potential water damage.
While trying to pinpoint the culprit of condensation buildup, note that in case you notice a wet carpet in the trunk or the rear seat area, the leak is not necessarily there. The water might be coming in from the front of the cabin area and flows down underneath the seats through the channels under the carpeting and reaches the back of the car.
Reasons for Windshield Leaks
Old Rubber Seal
Your windshield is sealed with the rubber seal around the glass. Over time, this type of material will naturally deteriorate with age, and this is the most common cause for windshield leaks. If you’ve had your current windshield in place for years when you notice a leak, an old rubber seal is most likely the culprit. You can either take your vehicle to an auto repair shop for a thorough diagnosis and have your windshield resealed or replaced, or do it yourself following the instructions further below.
Improper Installation
Another common reason for windshield leaks is improper installation. There are many signs which might suggest that your windshield was poorly installed, such as if you can hear unusual vibrating or rattling while driving or a “whooshing” sound while driving at high speeds, or if residues of old adhesive is left in the frame.
READ MORE
How To Fix A Windshield Leak

Fixing the leaks in a windshield is very easy. The only thing you need to pay attention to is using the correct materials. The rule of thumb is to never use silicone, as it expands under heat and contracts in the cold. In addition, once you’ve used silicone, you can’t reseal the seam with the proper sealant because it won’t adhere to the silicone.
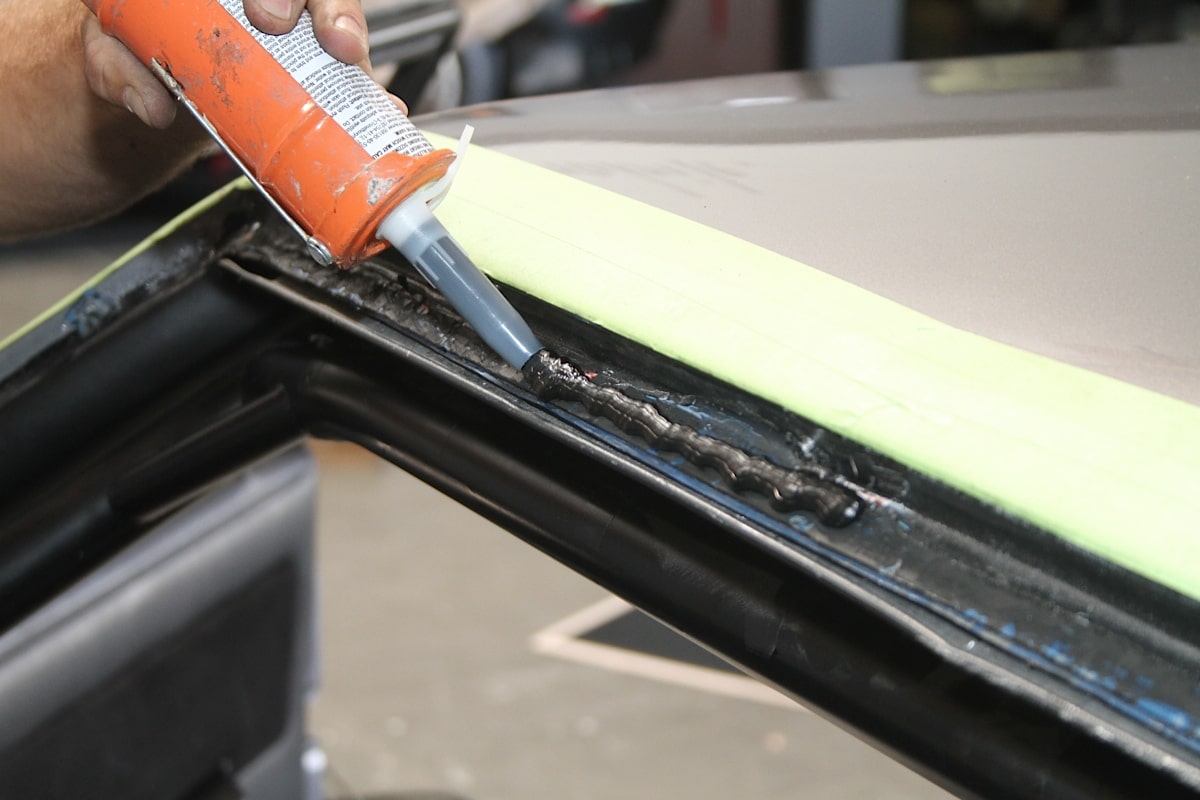
The best option is to use special seam sealant specifically made for this purpose, which typically comes in a tube for easy and precise application. These sealants flow into hidden cracks and pinholes that may be harder to reach and fill it up.
First, remove your windshield’s exterior trim. After using an adhesive remover or a paint thinner to clean under and around the seal, let it dry and apply the sealant to your windshield beneath the seal.
And ta da, you’re done. Just smooth any rough areas with some cloth or an index card. Let the sealant dry completely then repeat the soapy water or the hose test to see if water is no longer coming in from around the windshield. While many sources will tell you that a few minutes would do to dry the sealant, professional mechanics would recommend a 24 hour cure time for best results.
If the crack or pinhole is underneath the rubber trim or moulding of your windshield (which is harder to detect), you can just easily pry the trim up a bit to squeeze the sealant in. Let it dry completely and simply push the rubber trim back in place.
Sometimes, a butyl sealant, which is applied using a caulking gun, is also used at the repair shops. While urethane, a common adhesive/sealant used creates a hard bond with the windshield, a butyl sealant stays pliable and does not get hard. It’s only half the price of urethane sealants but is not as resistant to water or wear and tear.


