
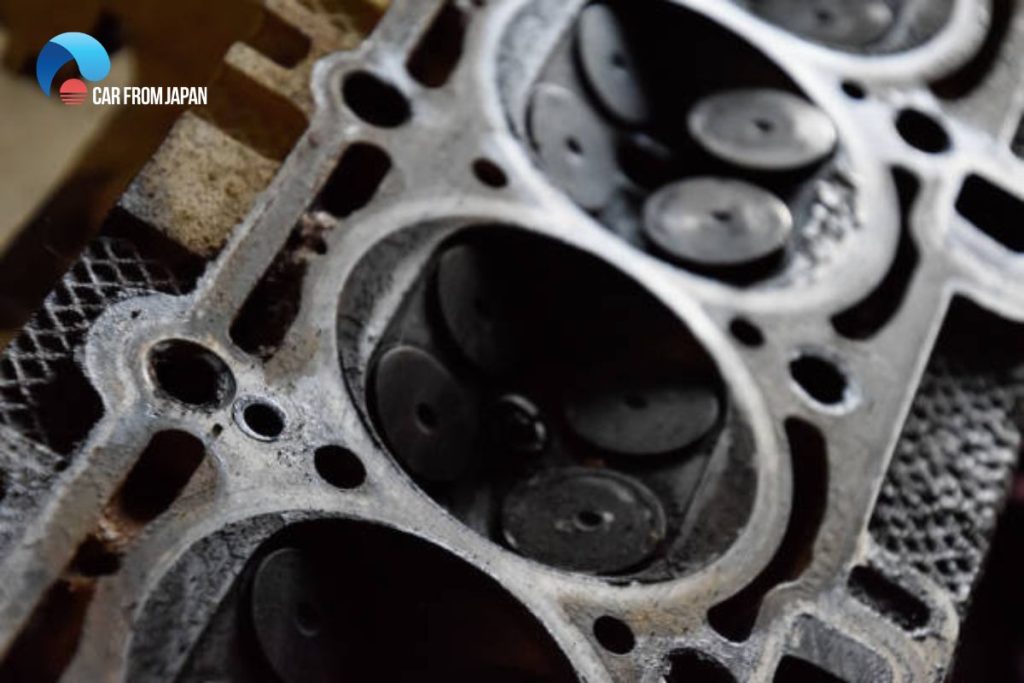
Let’s get straight to it. Sticky valves are a common headache caused by carbon buildup inside your engine. Shakiness at idle or weakness when accelerating could be a sign of sticky engine valves. This happens when soot and oil bake onto the valves. Let’s examine the simple causes and explore the best ways to address sticking valves from carbon deposits.
Contents
What Causes the Carbon Deposits On Valves
This black, sooty buildup doesn’t just appear out of nowhere. It’s usually caused by one of three things:
- Modern GDI engines: Most new cars use Gasoline Direct Injection (GDI). This means fuel is sprayed right into the cylinder, not over the valves. Because gas isn’t constantly washing the intake valves clean, gunk bakes onto them over time.
- Too many short trips: If you only drive short distances, your engine never gets hot enough for long enough to burn off the carbon and oil deposits, so they build up.
- Low-quality fuel or oil: Cheaper fuel can lack the detergents needed to keep things clean, and old or incorrect oil can contribute to more deposits.
Symptoms of Sticky Valves from Carbon Deposits
A sticky valve from carbon buildup can make several internal components of the engine stop working properly and manifest as one or more of the following symptoms:
- Rough cold idle: due to engine temperature sensors not working properly.
- Clicking noise: A sticky valve sticking will typically create a clicking noise that regularly occurs every two to three seconds at idle, particularly with a cold start. As the engine rpm increases, you will most likely hear more rapid clicking noises, but it may or may not get louder.
- Engine misfires: your engine may jump up and down, causing your car to start and stop suddenly.
- Hard engine starts
- Black exhaust clouds under hard acceleration
- Decreased acceleration or hesitation when accelerating
- The check engine light illuminates on the dashboard
Though carbon deposit is inevitable, you can limit its formation by avoiding excessive idling, avoiding making short trips by combining errands to drive longer distances each time, limiting cold starts, using better quality gasoline that contains a fuel system cleaner plus using better oil, and keeping the carburetor and fuel injection system tuned properly.
How To Fix A Sticky Valve From Carbon Deposits
Step 1 – Starting the engine and listening for clicking noises
Set your car in park and engage the emergency brake. Start the engine and allow it to warm up to normal operating temperature while raising the hood.
Look for the valve cover, which is a long rectangular box on the top of the engine. Use a stethoscope to listen for any muffled clicking noises coming from it. Sometimes, a valve that is stuck or only moves up and down slightly might make a popping noise.
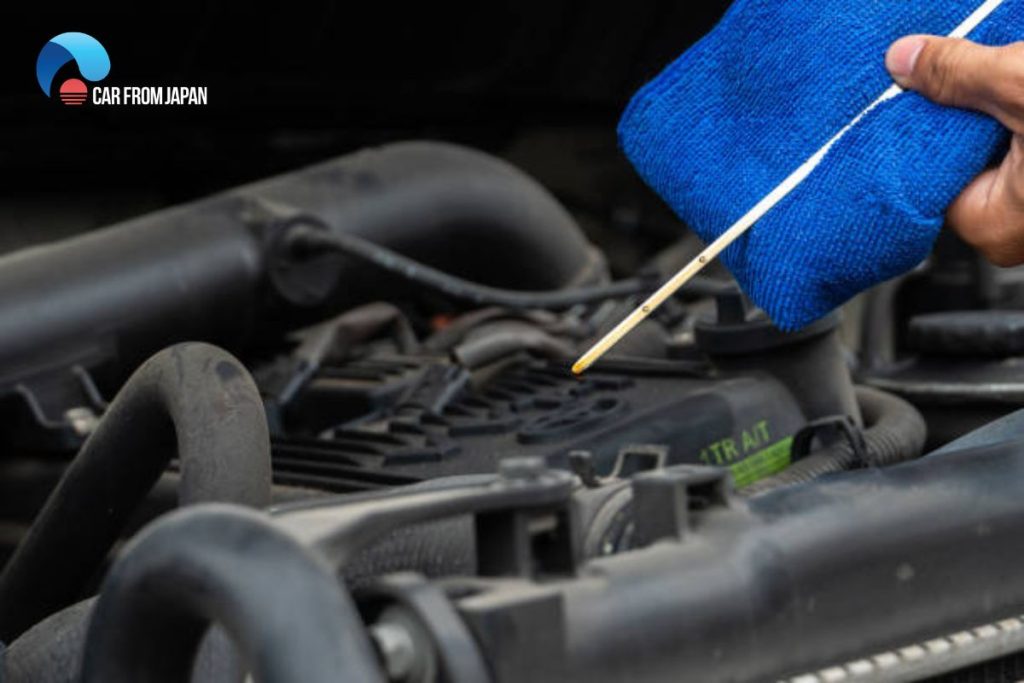
Step 2 – Restoring proper engine oil level
Shut the engine off. Open the crankcase to check the engine oil level. A very low oil level will cause all of the lifters to click, causing a machine-gun-like clicking that comes from both the front and rear of the engine.
If needed, fill the oil up to the line on the dipstick scale that is marked with the word “hot”. Start the engine again, allow it to warm up, and see if the noise persists after the proper oil refill.
Another scenario is that the oil level is higher than the “hot” mark, which can allow air bubbles to enter the system. In this case, drain off the oil from the crankcase until it reaches the “hot” mark on the dipstick.
Step 3 – Adding oil additive
Add a full can of oil additive to the crankcase. Engine oil additives are chemical compounds that improve the lubricant performance of the existing base oil. They contain antioxidants, corrosion inhibitors, anti-foaming agents, and demulsifying agents.
The oil additive will penetrate deep into the valve and lifter areas to lubricate and allow the sticky valves to move up and down properly again. After adding the oil additive, go for a few hours’ drive on the highway with some hard acceleration.
Avoid lugging the engine (that is, when you’re puttering along in a higher gear than you need to be in and the engine is turning low RPMs, which means the engine has to work harder to do the same job). When you’re done, wait for the engine to cool down before changing the oil and filter. If the sticky valve situation is not too serious, it should be resolved by now.
Step 4 – Lubricating the Valve Springs
When the engine has cooled down, use a socket to remove the valve cover. Look for the thick valve springs and spray penetrating oil inside the spring, where the shiny valve stem sits (it has a diameter the size of a pencil). Let the penetrating oil sit for several minutes for deep penetration. While you’re at it, check if all of the small retainer clips that sit on the top of each valve to hold it in place are in their proper position.
Use a small hammer to gently tap on the top of the valve springs to help free up the valve stem shaft so that the sticky valve can move properly. Now that you’re done, replace the valve covers and start the engine to check if the clicking noise persists.
Quick Summary
Sticky valves are a common headache in modern cars, but they are very fixable. You can start with simple, cheap solutions like fuel additives, but for heavy buildup, a professional walnut blast cleaning is the only way to get your engine running right again.