
A car battery is one of the most expensive pieces of equipment that you would wish to be in the best condition for a long time. A bad battery replacement might cost a lot, but not when you have an effective DIY on how to recondition a car battery solution. Yes, you read it right! You can recondition the car battery easily with our fail-proof method. So firstly, let’s find out what is refurbishing car battery!
Contents
What Are Reconditioned Car Batteries?
Reconditioned car batteries refer to the process of bringing back the healthy life and charging capacity of your old and dead cells. It will be a total waste to just readily throw away your old batteries when you can still recondition them one to three times.
So, instead of throwing away the batteries. Let’s learn how to recondition a car battery at home. You will be able to learn it in the following section of our article.
Why Should You Recondition Batteries?
What we always see is people throwing away their car batteries. It is understandable since no one wants the hassle and inconvenience of using batteries that are no longer efficient. Likewise, drivers have no idea about how to recondition batteries. The batteries are also incredibly expensive to replace and might not even go down in price as the device ages.
Reconditioning batteries allows you to preserve and refresh the function of your batteries so that they can work as they used to: providing you with ample charge and saving you a lot of money. It’s also better for the environment since batteries themselves are very hard to recycle and usually end up in trash bins, leaking chemicals into the environment and causing a huge impact on the well-being of the planet.
So, let’s explore the entire procedure of how to refurbish a car battery right now!
Use A Nifty Way To Recondition A Car Battery
No rocket science is involved in reconditioning your car’s battery. Just follow a complete procedure and do it yourself every time.
What equipment do you need?
Please prepare these tools in advance to recondition car battery!
- Battery charger
- Neoprene Chemical Resistant
- Safety Goggles and Gloves
- Flathead Screwdriver
- Plastic Funnel
- 1 Gallon of distilled water
- Plastic Bucket
- Voltmeter
- 1lb Baking Soda
- Optional Battery Post Cleaner
How To Recondition A Car Battery
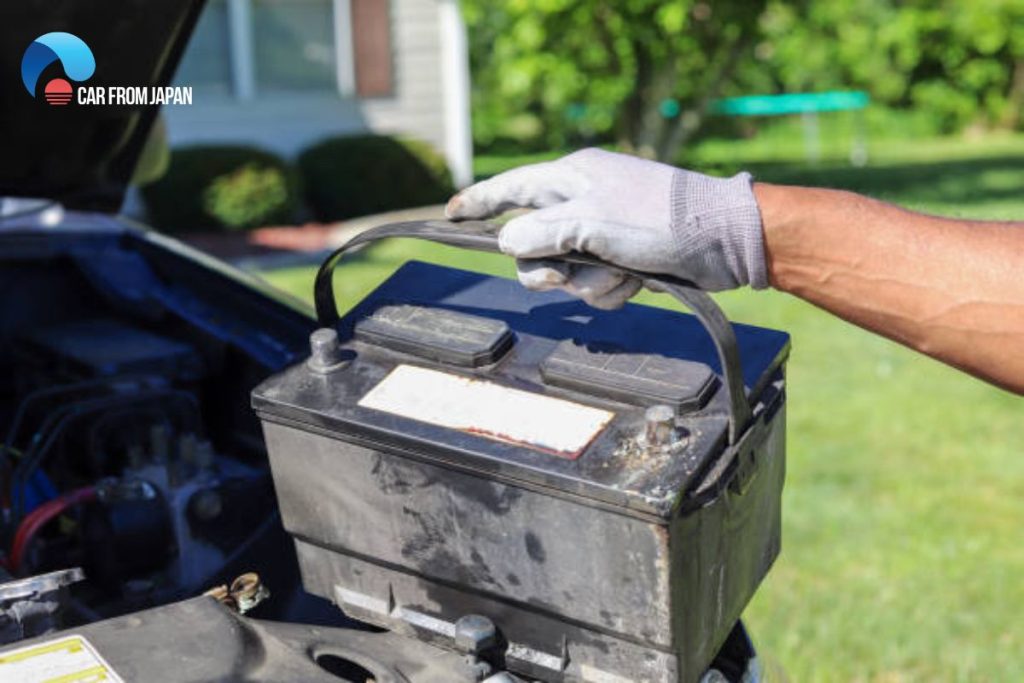
Step 1. Reconditioning groundwork
At the initial stage, cleaning the corrosion is vital. You can use a ready-made post cleaner or make your own solution to clean the terminals of the battery. You can also pick any available post-cleaning product on the market. To make your solution, mix 2 teaspoons of baking soda and 1 teaspoon of water until you see it transform into a fine paste. Now, take a toothbrush and rub it on the posts. For heavy corrosion, you can even use steel wool. This is the first step towards reconditioning a car battery in the right way.
If your battery has heavy corrosion, using either 300-grain sandpaper or steel wool is a great choice.
Note: Don’t forget to wear safety equipment like gloves and goggles.
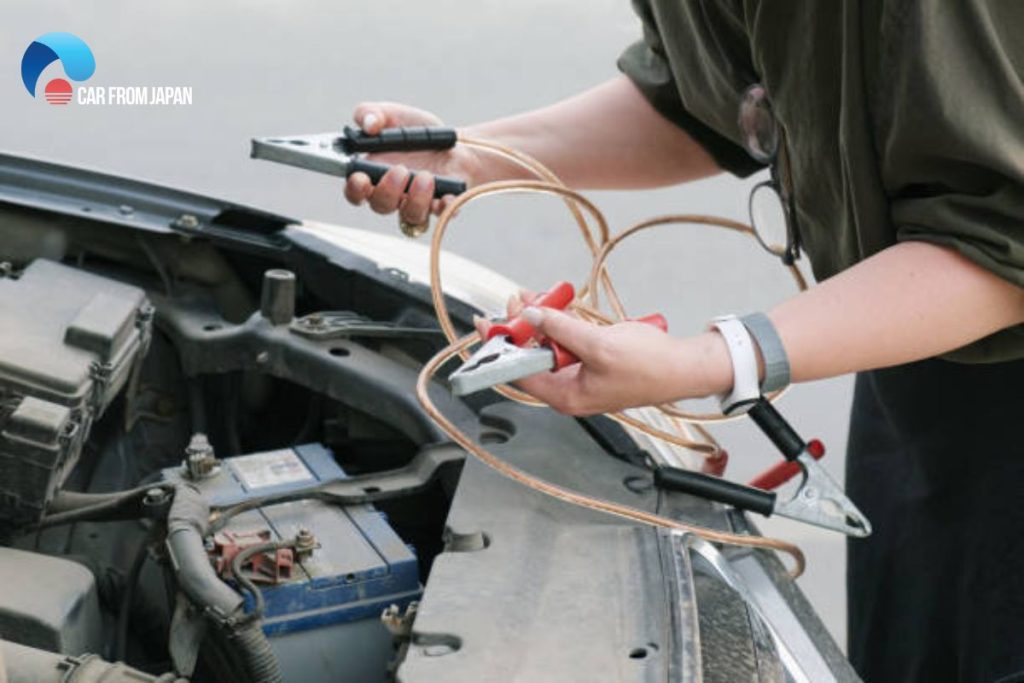
Step 2. Verify the battery voltage
The next step of how to restore car battery is verifying the battery voltage. The voltage tester voltmeter is the best choice, with the help of which one can get the correct parameters of power. There’s no rocket science to check the voltage, just connect the voltmeter to the battery terminals and you are good to go.
The condition for reconditioning a car battery is that the voltage of the battery is higher than 10 volts. If the readings are 12.6 Volts, the battery is in good condition, and if it’s more than this, reconditioning is surely needed. If it’s between 10 and 12 volts, you can restore the battery to full function.
On the other hand, if there are fewer than 10 volts, you’re probably wasting your time. There might be chances that you see zero readings. This indicates that the battery has gone through a short circuit. This is the time when you should use your maintenance tips or just contact the mechanic to handle the situation in the right way.
Step 3. Take out the acid
After successfully checking the voltage, it’s time to take out the old acid from the battery. With the help of a flat-head screw, reach to the battery caps. The caps may vary from two to six. Remove all the caps, but make sure that you have a container or bucket near you.
At this stage, before emptying each cel,l you should take the chance to test each battery cell individually. Doing this could help you discover if your car battery has a dead cell or not. When the battery cells are all empty, place your battery to one side take ½ lb of your baking soda, and add it to your bucket of old battery acid. This will neutralize the battery acid so you can safely dispose of it later.
Note: The liquid (Electrolyte) in lead acid battery cells is very dangerous. It’s a mix of sulphuric acid and water. You don’t want to get it on your skin, in your eyes or even on your clothes. So make sure that you are wearing all the security equipment.
Step 4. Put the battery back into working order
Now that you have cleansed the acid from the battery, it’s time to recondition it. For that, you have to refill the cell with electrolytes. The electrolyte is normally made of Epsom salt and distilled water. This will let your battery charge pretty well and avoid sulfates. Now, pour it into the battery.
Step 5. Finally, charge the battery
The last step of the reconditioning a car battery guideline is to check whether the entire reconditioning process is working or not. It’s not recommended to put the caps back on the battery as the electrolyte may overflow during charging. So, grab the battery charger, and connect the black (negative) lead to the negative terminal and the red (positive) lead to the positive terminal.
Keep the charging speed somewhere around twelve v/ two amp. Keep on charging for at least a day or 36 hours. Take the charger away and take readings through the voltmeter. Normal readings will be 12.42V. You can also go for the battery load test if you want. Otherwise, you are all set for an efficient car battery.
So, here you have completed the task of reconditioning a car battery. Don’t forget to wear safety goggles, gloves, and other important things.
Tips And Warnings When Reconditioning Car Battery
Tips
Unless you use car batteries for a few weeks or longer, put them on a trickle charger to restrict loss of performance. A stored battery gradually loses its charge, allowing sulfur to form on the lead plates.
To restore the battery to maximum capacity, put it on the charger for three or four nights.
Do not put the caps that cover your battery cells back on whilst charging it, it’s likely that the electrolyte liquid may heat up and overflow. You don’t want pressure building inside the cells.
Warnings
Do not use tap water because it contains chemicals that will harm a battery
Car batteries contain sulfuric acid which is very dangerous. You should work only in a well-ventilated area and don’t have open flames nearby. Wearing safety goggles and rubber gloves is also recommended. In an unfortunate case, if you get acid on your skin, irrigate it with water immediately.
Alternatives To Epsom Salt Battery Reconditioning
Normally, Epsom salt is used because it gives the best results. However, there are a few alternatives to Epsom salt you can try for battery reconditioning.
Aluminium sulphate
You can mix 1 lb of Aluminium sulfate with 1 gallon of boiling distilled water. Stir this mixture until it’s as clear as possible. Then, you fill the cells with the solution and charge the battery. As a result, the battery charges faster thanks to the electrolyte produced from Aluminium sulfate.
Copper sulphate
Copper Sulphate is another battery reconditioning substitute. From our experience, it isn’t as effective as Epsom salt, which is always the safe choice.
To know more about how to recondition a car battery, check the video below:
FAQs
Can you bring a bad car battery back to life?
It’s often possible to revive a dead car battery, at least temporarily, to get you moving again. However, once damage accumulates, the battery will ultimately fail and need to be replaced.
How do you know when battery reconditioning is done?
There are two main indicators:
– The charger: The reconditioning charger will signal that the process is complete, usually with a green light or a “Full” display. It will then switch to a maintenance/trickle mode.
– The battery: To confirm it worked, let the battery rest for a few hours and test its voltage. A healthy battery should hold a stable charge of 12.6 volts or higher.
How long does a battery need to recondition?
Battery reconditioning typically takes between 4 to 24 hours. The exact time depends on:
– The battery’s condition: A heavily sulfated battery will take much longer.
– The charger: The power and specific reconditioning mode of your charger affect the duration.
Conclusion
Hopefully, this article may be useful for you. If you have any questions, feel free to leave our auto experts in the box below, and we will answer them for you. Do not forget to read other maintenance tips for a better understanding of your car problems and how to fix them when needed.
How much Epsom salt do you mix into a gallon of distilled water?
Should be lots of google responces to that question…Id like to see if this is legit. Smiles.