
Knowing how to remove tire from rim is an important skill that every driver should know. It not only helps you save a small cost when you have to give the car to the mechanic every year but also provides special support when experiencing an emergency situation. However, sometimes, removing your tire from the rim is not an easy task and some drivers think that this process can’t be done at home. Don’t worry! In this article, we will summarize the shortest steps to help you do tire removal in easy ways.
Contents
How To Remove Tire From Rim Manually?
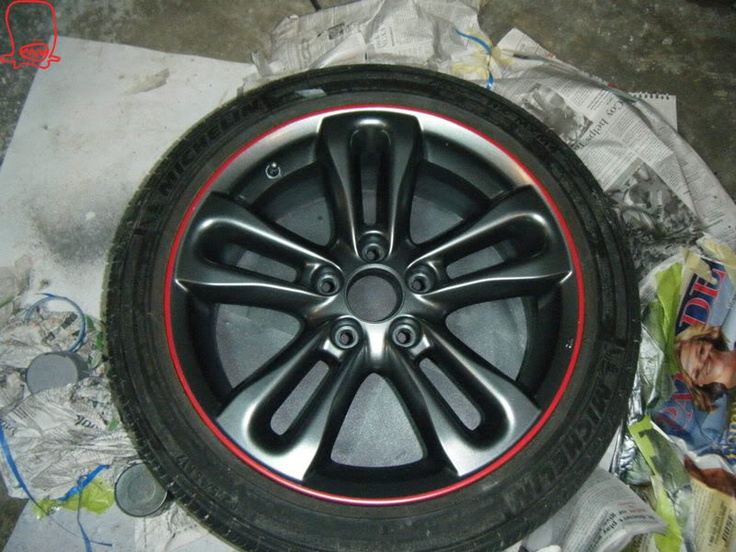
Unlike motorcycle tires or bicycle tires, removing your car tire from the rim seemingly sounds like a complicated job because it requires more skills, and you must have some basic knowledge of mechanics. However, if you are newer, you can follow our guide below to have an overview of the steps to take off your tire. Practice all your tire skills at home before you need them for real out on the tracks. Before starting your process, let’s spend time to go find out the tools needed to change tires from your rim:
Some necessary tools to take off a tire from the rim
This process can make it easier when you prepare all the basic tools. What you’re gonna need is:
- Soapy solutions or any kind of lubricant: It will help you lubricate the tie and make the tool slide along.
- A breaking tire bead tool: Tire breakers are tools used to remove the tires of cars and other vehicles. This tool is sometimes referred to as a tire lever, depending on the intended application and specific design.
- Tire jack or car jack
- Screwdrivers and wrenches
- A valve core removal tool: The valve stems remover, or the Schrader valve tool is basically a special screwdriver for removing the valve stem sealing check valve.
These are all necessary tools. You should always prepare these tools to keep in the car before driving anywhere, it’s not only effective for getting rid of your tire but for every possible situation that can happen.
>> Related post: Changing Tire Size On Same Rim: Is It Possible?
How to take a tire off a rim at home (7 easy steps)
After having all the basic tools, let’s roll your sleeve to know detailed steps:
Step 1: Find a safe place to remove the tire
You need to find a flat surface to prevent the vehicle from rolling while changing tires midway. Try to park away from heavy traffic, at turns, and turn on emergency lights. Avoid parking on soft and sloping ground, where there is not enough space to follow the instructions for taking off the tires. You can use stone, or concrete to block both front and rear tires. This helps to keep your car balanced when you manipulate anything.
Step 2: Jack your vehicle
Place the jack right under the car near the tire to be changed. Make sure the jack is in contact with the metal part of the frame for a good fit. Many vehicles have other parts made of molded plastic under the vehicle. If you don’t put the jack in the right place, it will break the plastic in that part when you start to lift the car. If you are not sure, read the user manual carefully.
In most modern cars, their undercarriages will have a small notch or marker located behind the front wheel or in front of the rear wheel to place the jack in to match.
A car jack is one of the very good support measures for changing car tires or checking brakes. Usually, car manufacturers will equip users with a mini jack so that they can perform rescue operations themselves. In urgent cases, it is not easy to use a jack to lift the car and approach the undercarriage. Just being negligent can have unintended consequences. The tire jack should be firmly in place. Double-check to make sure the jack stands perpendicular to the ground.
Step 3: Take off your wheel
You should also note that do not jack the wheel in the first place, it will lose the wheel’s resistance. By keeping the wheel in contact with the ground, when you loosen the first screws, you will actually turn the screw instead of turning the whole wheel. Use the wrench in the vehicle kit or one of the standard crosshairs. The wrench can be of different sizes to open different buttons. A properly sized wrench will make it easier to remove the screws. This can be exhausting so you may have to use your body weight or stomp your feet on a wrench to get resonance and you have to make sure you swing in the right direction.
In addition, you can loosen the screws by diagonally loosening the opposite screws first, sequentially like in a star pattern. Note that this is done before jacking up the tire so that when removing the screw, it does not slip out of the wheel.
Step 4: Remove the valve core
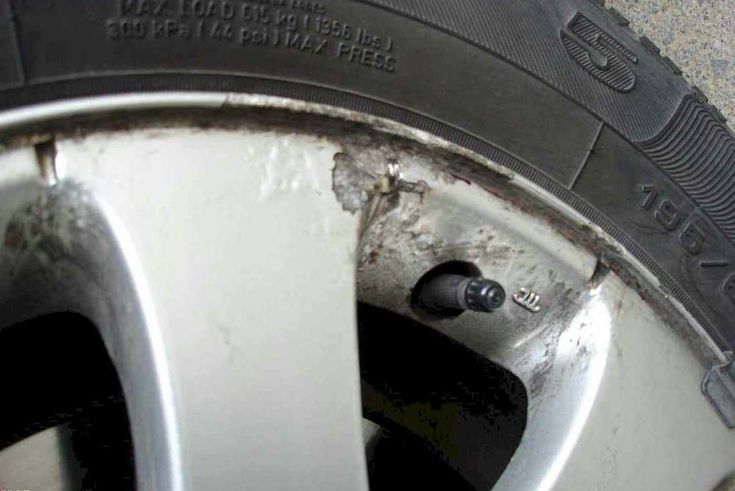
It’s an important step so why do you need to do this? Because we’re going to be wanting to get all of the air out of the tire. And the easiest way to do it is simply just to remove the valve core with your tools. If you don’t take the valve stem out and you leave the air in the tire when you put your tire to break the bead. There’s a good chance that your tire is gonna blow up. So you should make sure that you take out the valve stem completely.
Undoing the valve core is very straightforward. Using the valve core removal tools gradually turn it counterclockwise until the valve is completely removed. Sometimes removing a tire can be difficult as the tire pressure can cause the tire to pop out of the wheel so be sure that there’s no air in your tire before starting the process.
Step 5: Break the tire bead
First, you should know what is a tire bead. This part is very important for your tire. It helps securely fit the tire to the rim and seals in the inflation pressure. It can be found in every tire on the inner side and the outer side. There are some methods you can apply to break the tire bead. You can use some specialized tools (c-clamp, pry bar, or bottle jack) or even your feet combined with the flat metals.
Besides, using a Hi-jack is also a preferred way, you just simply position the tire and make sure that the foot of the jack needs to be close to the rim as possible but not actually touching the rim. You may need to break the bead at 2 or 3 points on your tire. You should know that the bead is the most stubborn component of your tire so it can take you a little time to separate the bead from the rim.
Step 6: Remove the old tire with your feet
When removing the tire from the rim is easy to slippery, you need to use the strength of your feet to position the tire to reduce the scratch and increase the leverage. To prevent the tire from sliding, let place your tire on other tires or a carpet.
In this step, you can spray soap or oil around the rim to lubricate it. During driving, the rim will stick to the tire so applying lubricant to the edges of the rim can make it easier to remove. And dishwashing liquid is probably the best thing that you might have handy.
Step 7: Continue using a screwdriver or pry bar to remove the rim
Place the tire and wheel flat on the ground, placing the flat end of one of the raised bars between the tire and the rim. Pull the bar back, laying flat across the center of the wheel to bring the first part of the tire to the outside of the rim. Keep the pry bar in place and fix it so it can’t pop out between the rim and the tire. Once you have finished working on one side of the tire simply flip the tire over and do the same steps on the other side using a screwdriver and pry bar. You then slowly remove the tire off the rim starting at one point and continuing out in both directions.
Note that: you should not touch the pointed end of the pry bar or screwdriver directly to the rim as it can easily scratch the rim. In this case, you can use electrical tape or soft material to prevent the sharp edge of the pry bar from damaging your rims.
This is also the final step of the manual tire removal process from the rim. Continue using the pry bar to pry the soleplate until you can fully pull the tire off the rim.
>> Read more: What Size Rims Fit My Car?
Final Thoughts
We hope that these step by steps will give you useful information and support you to finish the tire removal process easy. However, besides using tools like a screwdriver or a pry bar you can dismount the tire from the rim with a manual machine. We will explain and make clear the topic of how to remove tires from the rim with a manual tool in the next article. Follow us to read the next article.