There are few things more frustrating than being stuck in your car because the power seat won’t move. Whether it’s jammed back where you can’t reach the pedals or pinned against the steering wheel, you can’t drive safely. This guide will show you how to manually move a power seat so you can get on your way, and then how to find the real problem.
Contents
What Is a Power Seat?
The power seat has become standard in today’s vehicles. It is equipped with a set of electric motors that control the positioning or movement of the seat.
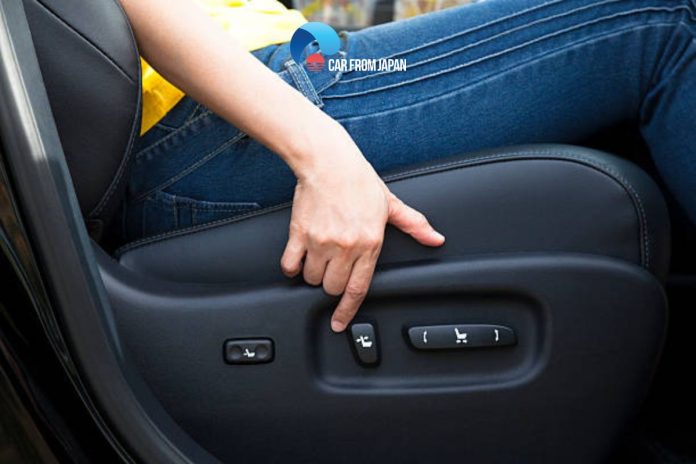
Another important element is a power switch that looks similar to a small joystick. The role of the switch is to send power to operate the motor of the chair. It is attached to the seat’s lower portion, enabling the driver to move or adjust the seat in any position he likes.
In most cars, the set of electric motors is built in for the driver’s seat only. Passenger seats can be adjusted through their switches.
Reasons For Power Seat Not Working
There are many reasons for a power seat to become stuck. An unmoving power seat is likely a result of a broken power seat switch. You might not be able to move your seat at all, or it might still move, but only in limited directions. Scroll down to the end of this guide to learn how to replace the power seat switch.
In rare cases, the issue can be caused by stuck debris somewhere in the power seat system. If this is the case, you should seek professional services to get the power seat back into action.

Power Seat Not Working: Try These First
Before moving on to how to manually move a power seat, learn these quick fixes if you’re dealing with a failing power seat. Sometimes you can easily resolve the problem in your garage. If all fails, temporarily move your power seat manually until you can have a professional look at it.
Push the seat down while moving it
Provided that nothing is hindering the seat movement and the motors are still on, try this tip first when your power seat is acting up. Simply push the seat downwards with considerable pressure while at the same time moving the seat backward or forward. You can try the same for the side movements.
Another simple, quick fix is to try holding on to the switch and moving the seat in the desired direction.
Loosen the seat bolts
Another common reason for a stuck power seat is accumulated tension between the seat and the bolts connecting it to the rails. Loosening them may give the seat maneuvering space and restore it to action.
Check contacts
Bad contacts can also lead to electrical transmission failure, which means the seat will not receive power to move. Check the contacts of the seat switch mechanism to see if they are clean, and check all connection points to make sure the seat is properly powered.
Re-align transmission cables
Check below the seat for the three cables that connect to the power seat transmission. Make sure they are all connected. A common problem with an immobile power seat is that one cable may be disconnected.
All you have to do is push the cable back to its position. You should hear a distinct click for correct positioning. In some cases, where the cables are worn out due to entanglement between the seat and rail, you may need to replace them.
If all of the above fails to fix your stuck power seat, do not worry, as you can still temporarily alleviate your misery. Learn how to manually move a power seat with the following simple tools and steps.
How To Manually Move A Power Seat: Tools You Need
- Gloves
- Safety glasses
- Screwdriver
- Winder
- Drill or pliers
- Scissors or knife
- Bolt cutter
How To Manually Move A Power Seat: Easy Steps
Follow these steps to know how to manually adjust power seats before you can get professional help.

Step1: Remove the seat
Since you’re dealing with electrical parts, always make sure that the engine is off and the batteries are all taken out. Remember, safety first.
Remove the seat from the car by either detaching the entire chair or by just slicing open the rear with the use of the scissors or knife.
Slicing the spring mesh
Next, cut the spring meshes below the car seat using the bolt cutter. Cut the meshes only. Be careful not to rip or damage any other neighboring parts, or you will have to deal with brand new problems.
You will be able to see the lengthy shaft that controls the position of the chair.
Maneuvering the shafts
Now that the shafts are exposed, use the pliers to move the shaft to position the seat the way you prefer. Turn the shaft left if you wish to move the seat forward and turn the shaft right to move the seat backward.
Now you’re done. However, this is only a temporary fix. You still need to bring your car to your trusted mechanic later for a comprehensive diagnosis for necessary repairs and replacement of any damaged parts of the power seat system.
Test drive
There is no point in fixing anything in your car if you do not test immediately whether you have done the right thing. After this, do a test drive.
If the seat placement remains awkward or uncomfortable, repeat the process until you can control your vehicle freely and easily.
Watch more:
How To Replace Power Seat Switch
As mentioned above, a broken power seat switch is a common culprit when a power seat is stuck.
When replacing a defective switch, you will need the following tools:
- Safety glasses
- Protective gloves
- Flathead and Phillips screwdrivers
To remove and replace the switch, follow these steps and take note of how each component is assembled for easy installation later on:
- Disconnect the power seat’s negative battery cable and set it aside.
- Remove the trim panel of the seat. Use screwdrivers to loosen the screws. Then pull the trim panel away from its cushion to release the remaining clips.
- Remove the screw from the switch panel using the screwdriver to remove the panel.
- Remove the power seat switch electrical connector by pushing down the tab and then sliding it off.
- Now that you’re done, install the new switch by repeating these steps in reverse order.
Final Thoughts
Now you have two valuable skills: how to get a stuck seat moving in an emergency, and how to track down the real problem. Remember that the manual move is slow and tedious, but it will always get you out of a jam. When it comes to the fix, always start with the simple stuff like the fuse and switch—you’ll be surprised how often that’s all it takes.


driver power seat on 2016 accord makes grinding sound when moving upward but not downward. But cannot get seat all the way up. Is it the motor?